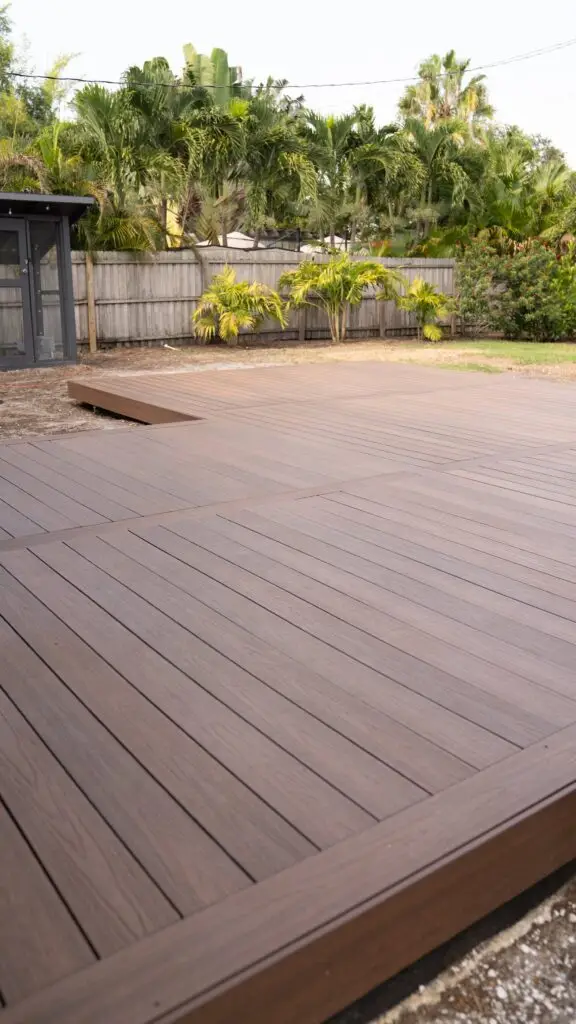
Earlier this summer we started what is probably our biggest project to date at our Bungalow. This composite deck project is part of a bigger backyard transformation and we are so excited to share it with you! In this post, we will go into detail on How to Install a Composite Deck. We dedicated another blog post for the final reveal of the deck along with some inspirations for the final product. Let’s jump into it!
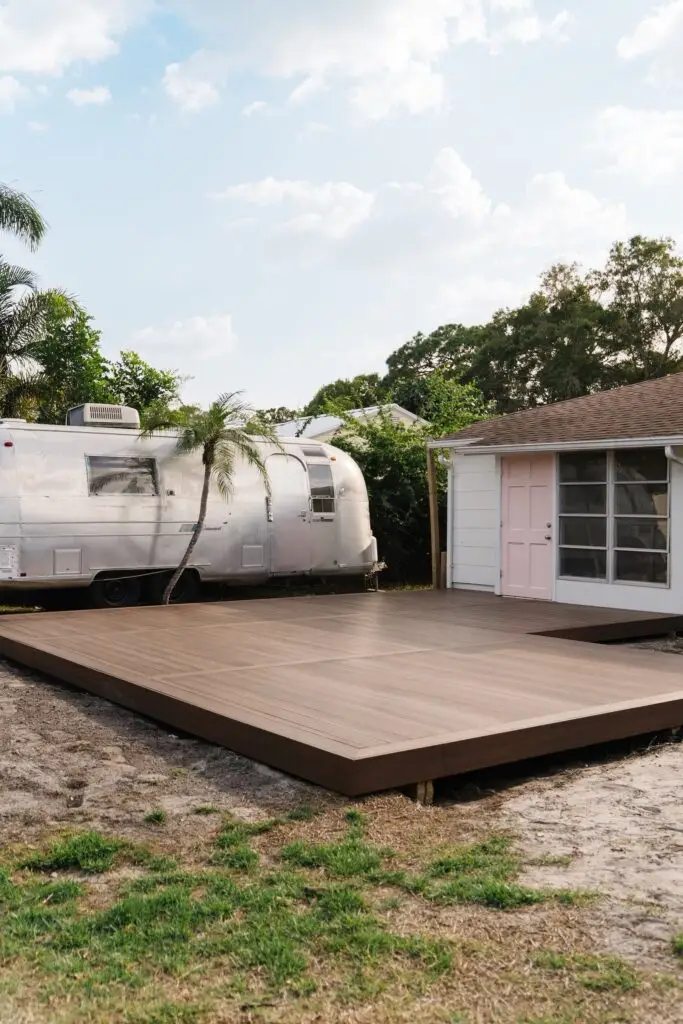

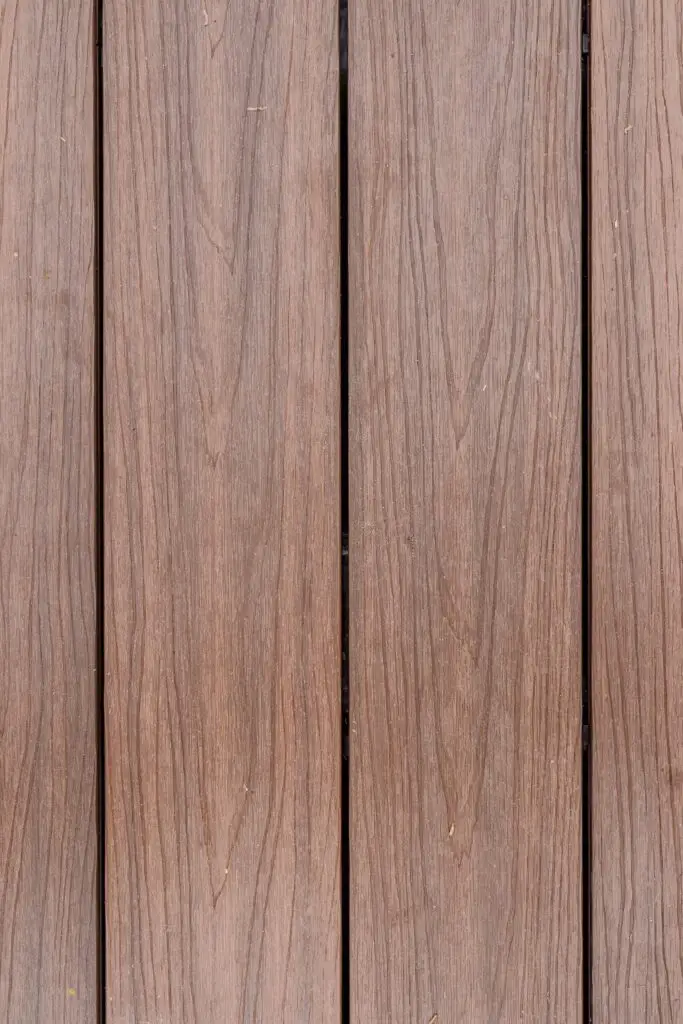
When it comes to deck boards, there are seemingly endless types, sizes, and manufacturers to choose from. Our research ultimately led us to opt for the Denali CALI Decking TruOrganics for a number of reasons. CALI offers two different sizes of deck boards in the Denali: one that is 12 ft long, 5-7/16 in wide, and 7/8 inches thick, and another that is 8 ft long, 8-1/4′ in wide, and 7/8 in thick. Not only do we love the dark, rich color of the Denali, we also love that the wood grain texture looks and feels very natural. CALI decking is extremely low maintenance compared to traditional wood decking — no painting, sealing, or sanding required (this also means no splinters)! It is backed by a 25 year warranty and is designed to stand up to moisture, rot, and insects, all of which are constant worries for us here in Florida. CALI decking is a no-brainer if you are looking for quality decking that is backed by a manufacturer’s warranty. Plus, you can mention that Blushing Bungalow referred you for up to 25% off your order!
Master Material List
(Disclaimer: the materials linked here are specific to the size of lumber that we used for our deck. You may need to adjuster some materials to ensure that they match the size and dimensions of the lumber you will be using for your deck)
Tool List
Material List
- Concrete Form
- Post Base Anchor
- Joist Hanger
- Hurricane Tie
- Joist Hanger Nails
- Concrete Mix
- Rebar
- String
- Joist Tape
- Screws
I’d like to thank CALI Decking for sponsoring this project.
Can you build a composite deck yourself?
Yes! The most important step in building a deck is the first: planning. The first question to ask is: What will be the function of the deck? Is the deck going to be a free-standing or floating deck away from any other structures on your property? Or will it be attached to your home and function as a walk-out patio? Understanding what you plan to use the deck for will help determine the location and size of the deck on your property.

Because we live in a small house, we knew that we wanted the deck to be a comfortable extension of our home where we could spread out, enjoy the outdoors, and entertain guests. We shared all the details for the backyard transformation which includes renderings and we couldn’t be more excited about our plans. We decided that the deck needed to be large enough for an outdoor kitchen, dining area, and lounge area. We opted for an “L” shaped deck to accommodate these three living spaces as well as the “walk-out” area by the house. The large portion of our deck where the three living spaces will be measures 24’ x 12’ and the “walk-out” area that connects the house and the living areas measures 10’ x 12’.
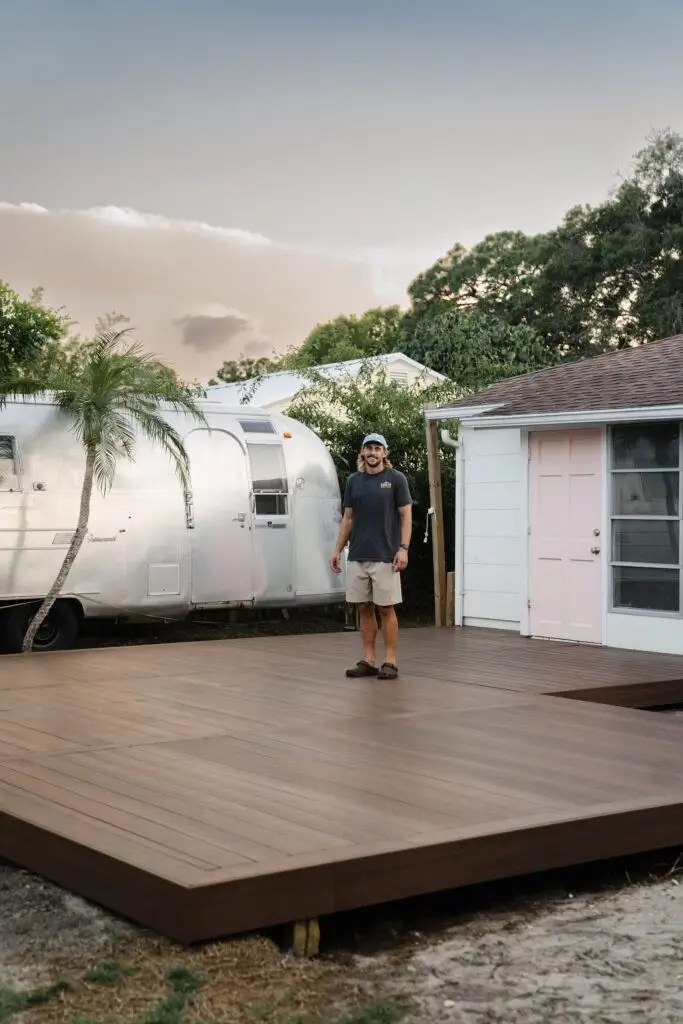
How to Install Composite Decking on the Ground
After figuring out the estimated size of the deck, you will want to figure out the type of decking boards that you plan to use. These days, there are so many different options in terms of materials that can be used for a deck, whether it be composite or wood. Knowing the dimensions of the deck boards that you will be using for your deck will end up saving time and resources.
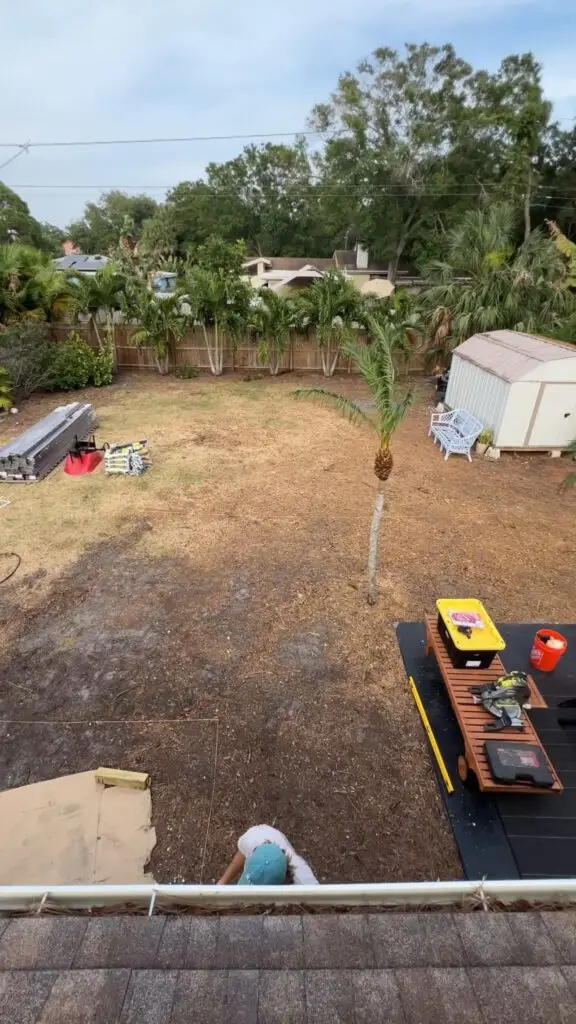
In this planning phase, you can adjust the size of your deck according to the dimensions of the deck boards, which means you make fewer cuts and waste less material in the long run. This also means that you will want to plan the pattern that you want for your deck boards.
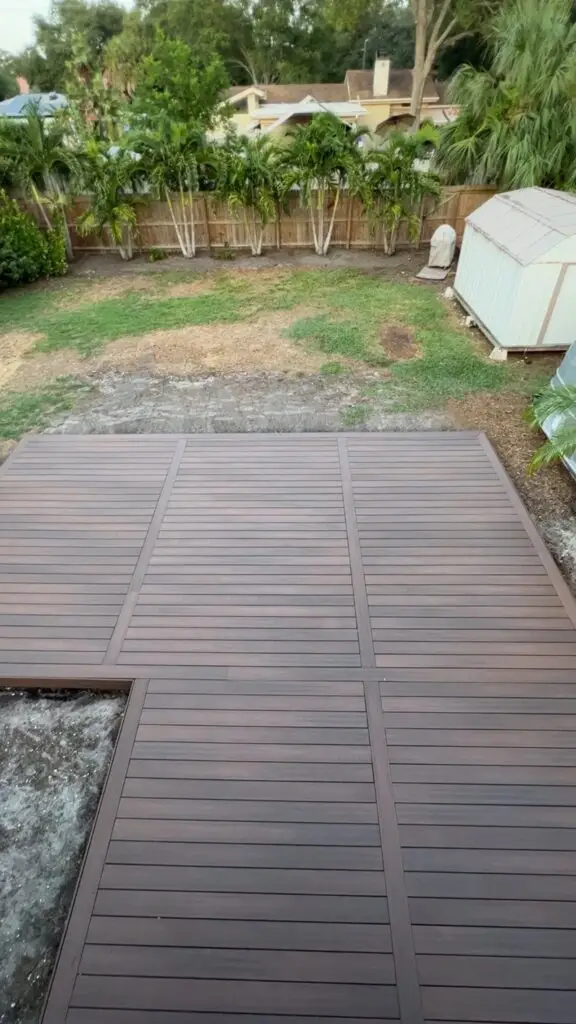
We opted to use a picture frame pattern for our deck boards, and with the size and layout of our deck, we decided that 5 different picture frames would look best. Having the pattern planned for your deck at this part of the process will also help plan your deck frame to accommodate the pattern.
What materials do you need for composite decking?
Once you have the size, location, deck boards, and pattern selected, the next thing to do is start building the foundation of the deck. Based on how high our back door sits above grade, we knew that we would only have space to use 2×6 lumber to build the deck beams and deck joists. The location and spacing of the concrete piers needed for your foundation will ultimately depend on the size lumber that you will be using to build the deck frame. Concrete piers support the beams that the deck frame is built on. Refer to THIS CHART to see how far apart your concrete piers will need to be. Additionally, if you plan on building a deck longer than 16 ft, then you want to strategically place a beam in a place that will allow you to “sister” or overlap two deck joists on top of a beam to achieve the desired length of the deck.
What base do you need for composite decking?
- Be sure to refer to the chart below to determine how far apart your concrete piers will need to be placed. Placement will depend on the size of lumber you will use to build the deck beams, and the number of deck beams that you will need ultimately depends on the size of lumber you will use for the deck joists. You will also want to make sure that you cut your concrete forms at a length that will ensure the concrete piers rest below the frost line.
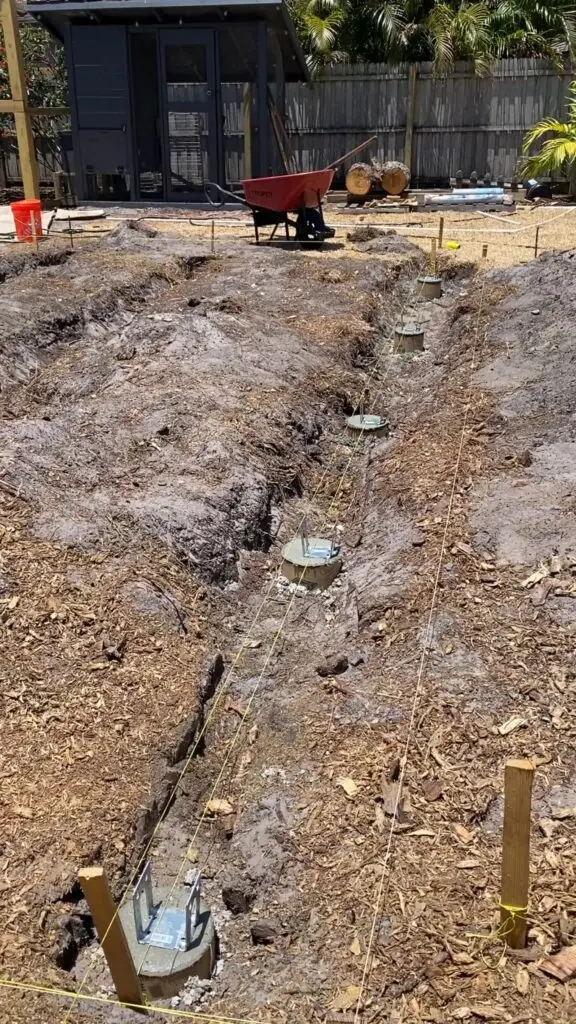
- Before setting the concrete forms in the ground, we tamped the dirt at the bottom of the hole, added landscaping fabric, and a few inches of gravel. To make sure that the concrete forms are in a straight line and level, we tied string to stakes placed at each end of the line. We used a line level to ensure the string was level. When placing the concrete forms in the ground, we adjusted the amount of gravel at the bottom of the hole to ensure that the top of the concrete forms touched the string. Because of the height of our back door, we ended up having to dig trenches for each line of concrete forms and beams so as to allow enough space for the deck frame and deck boards to be installed on top of the beams.
- After all of the concrete forms are in place and level, you can begin to pour the concrete into the forms. You will want to backfill the around the concrete forms with dirt to hold the concrete forms in place while the concrete is poured inside. I would not recommend backfilling around the forms completely, however, since some adjustments still may be needed even after the concrete is poured.
- When pouring the concrete, you will want to use rebar inside of the forms to make sure that all of the concrete settles inside of the concrete form. You will notice that the concrete sticks up outside of the form, which is a good thing. This allows you to pat the top of the concrete and shape it so that rain can drain off of the forms easily.
- After pouring the concrete into the forms on each row, we began placing the concrete anchors into the forms. We used the string again to ensure that the anchors were facing the correct way and were in line with each other.
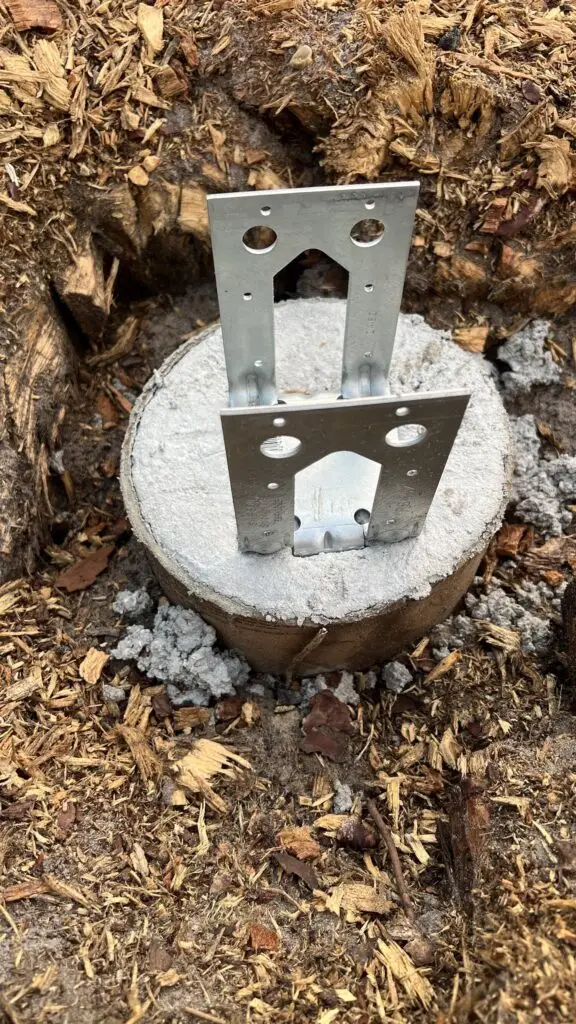
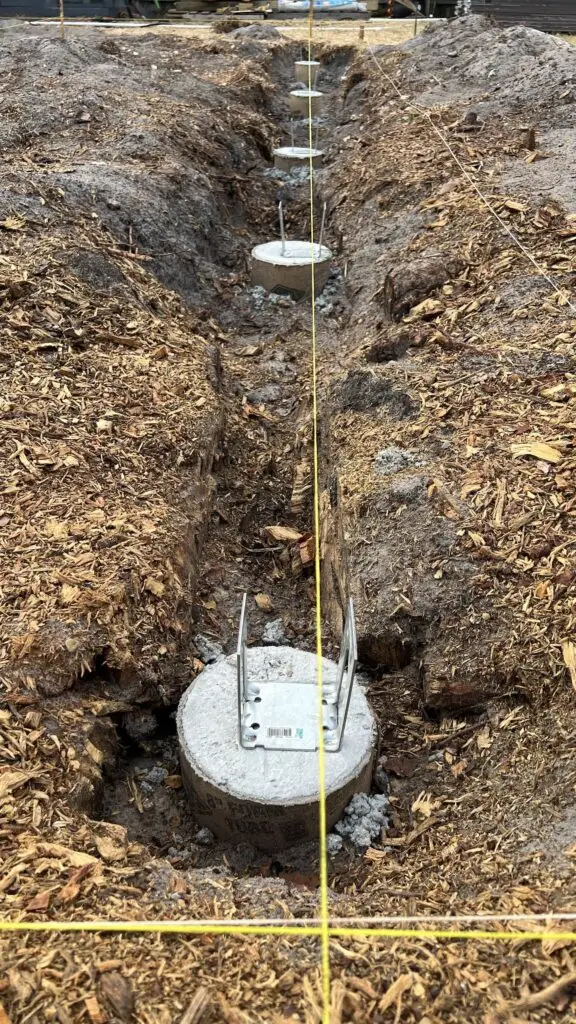
Building the Base for the Deck
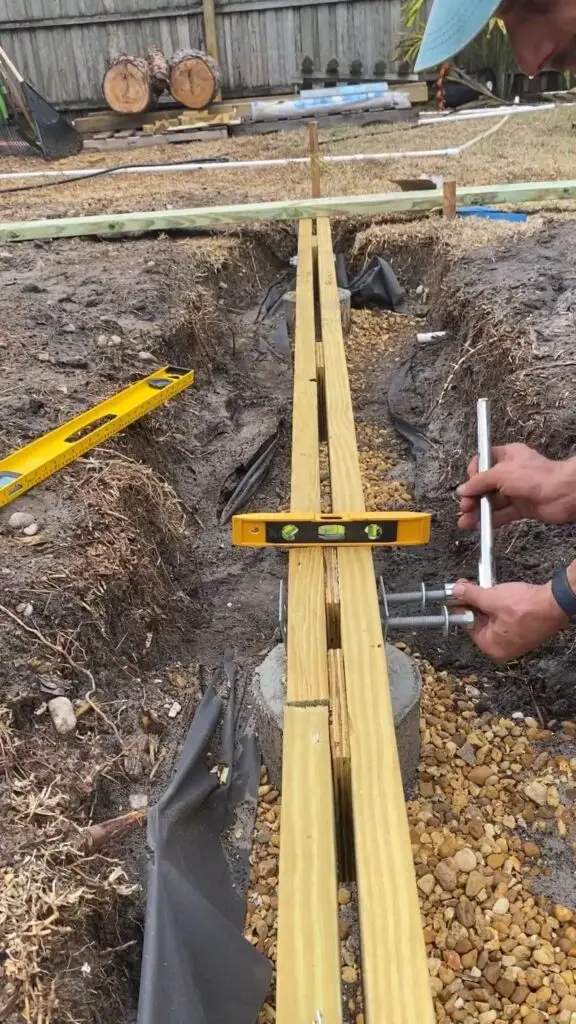
Next, we built our deck beams by doubling 2x6s. Because the concrete anchors that we used were wider than two 2x6s, we used a piece of pressure-treated plywood as a shim in between the 2x6s, placing a shim every 4 to 5 feet. Once the beams were assembled and the concrete piers were dry, we placed the beams inside the anchors and used galvanized bolts to attach the beams to the anchors. And of course, you will want to check that everything is level at each phase of this process.
How close do joists need to be?
Now that the concrete piers and deck beams are in place and level (hopefully), you begin placing the deck joists and building the frame. Here is another CHART to reference for joist sizing and support. This part of the process is a lot of fun because it is the first time that the thing you have been working on actually starts to resemble a deck.

We started closest to the house and began installing a “header” board that the deck joists would be attached to. Simply put, you’ll need a board that runs perpendicular to the joist to begin building the frame. You will want to check the installation guidelines from the manufacturer of the deck boards to see how far apart they recommend installing deck joists.
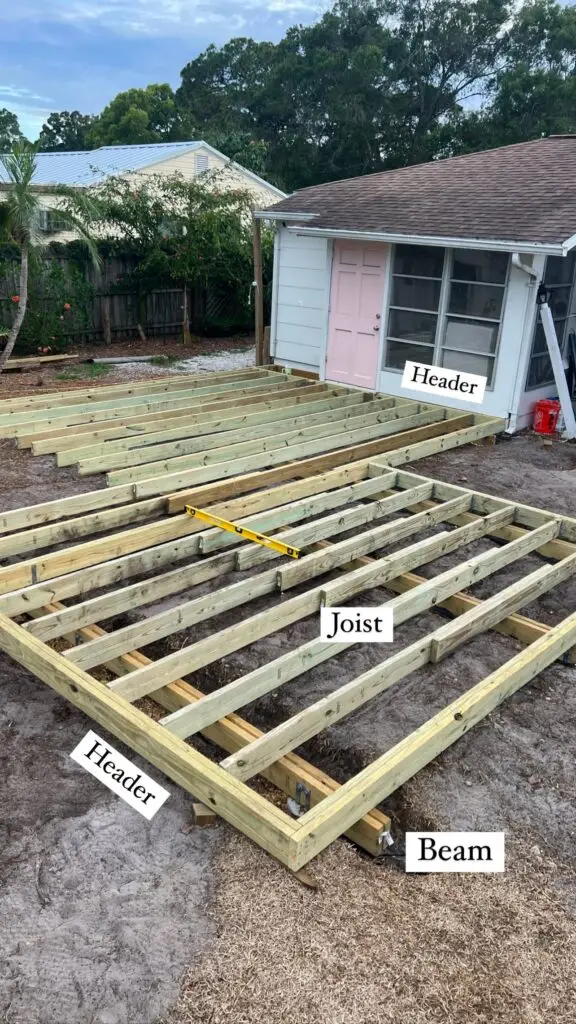
Recommendations tend to vary between 12 inches on center and 16 inches on center depending on the type of deck board and whether the deck is residential versus commercial. We checked the installation guidelines from CALI and they recommended 16 inches on center for a residential installation, so that is what we opted for.
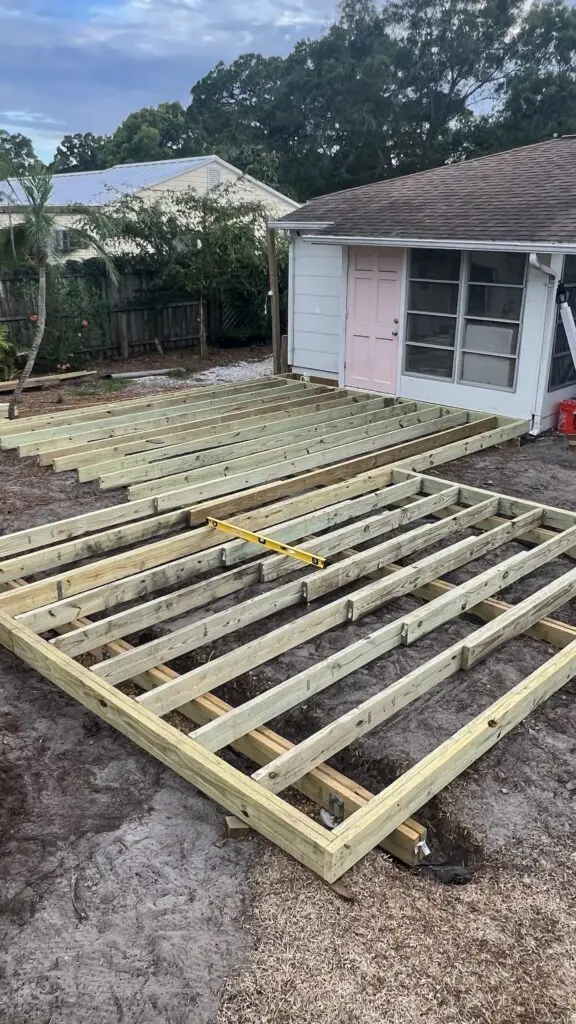
From our research and experience, it is best to install all the joists along the header on one end before installing the header at the other end. This will allow you to properly space the joists at the other end when attaching them to the header. It will also allow you to use a chalk line to cut the ends of the joists so that the deck is square. We attached each joist to the header boards, we used 2×6 joist hangers and galvanized nails.

Using Joist Tape
Once the frame has been built, I recommend applying joist tape on the top of each joist. This will help prevent moisture from sitting on top of the joist underneath the deck board. Without the joist tape, the deck frame is much more susceptible to rotting.

Composite Decking Fasteners
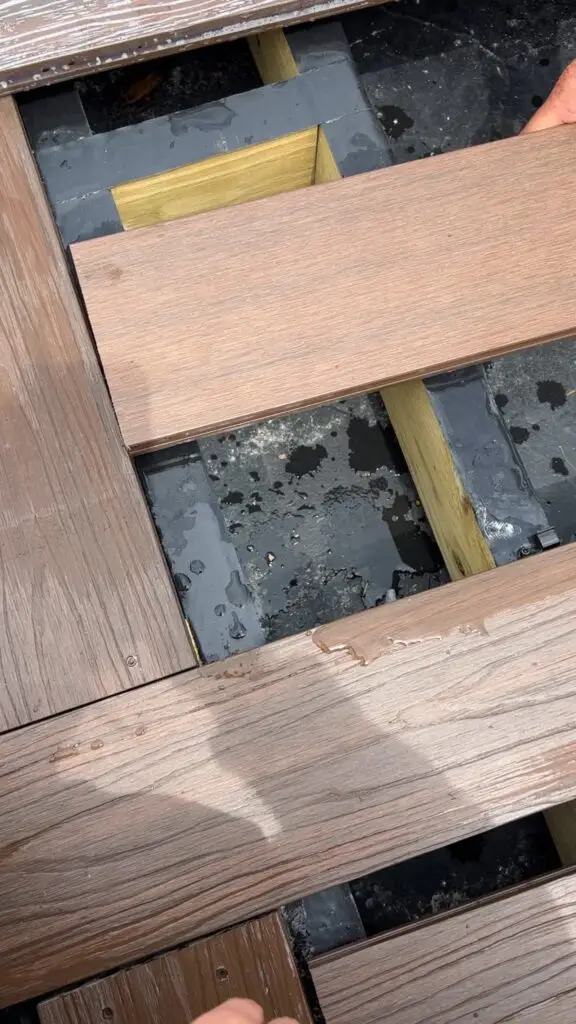
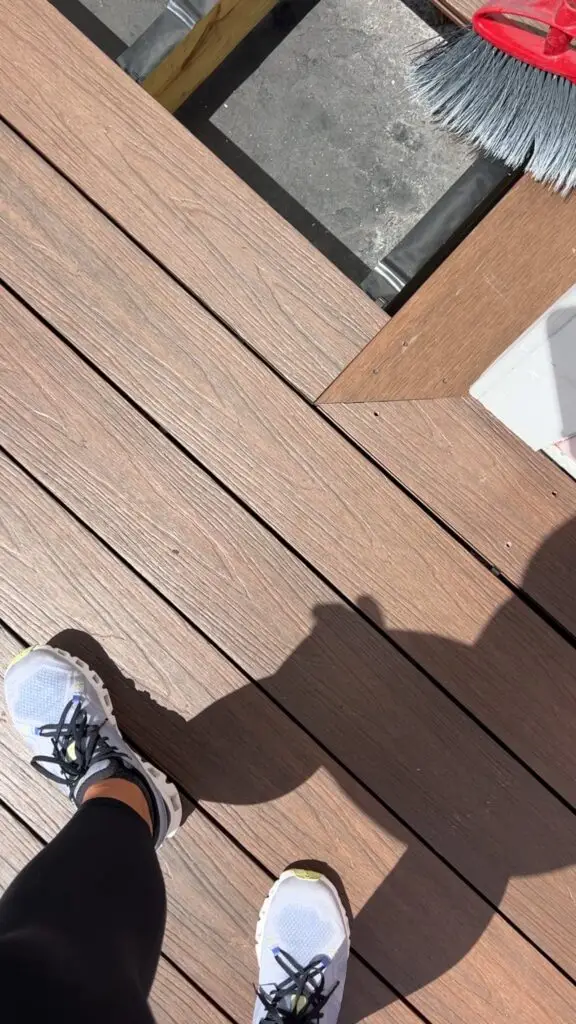
We started the deck board installation by first laying out our “picture frame pattern.” After attaching the deck boards that formed the “picture frame pattern,” the rest was easy with CALI’s hidden fastener system. We measured each cut within the picture frame pattern and placed the board on top of the frame, perpendicular to the joists.
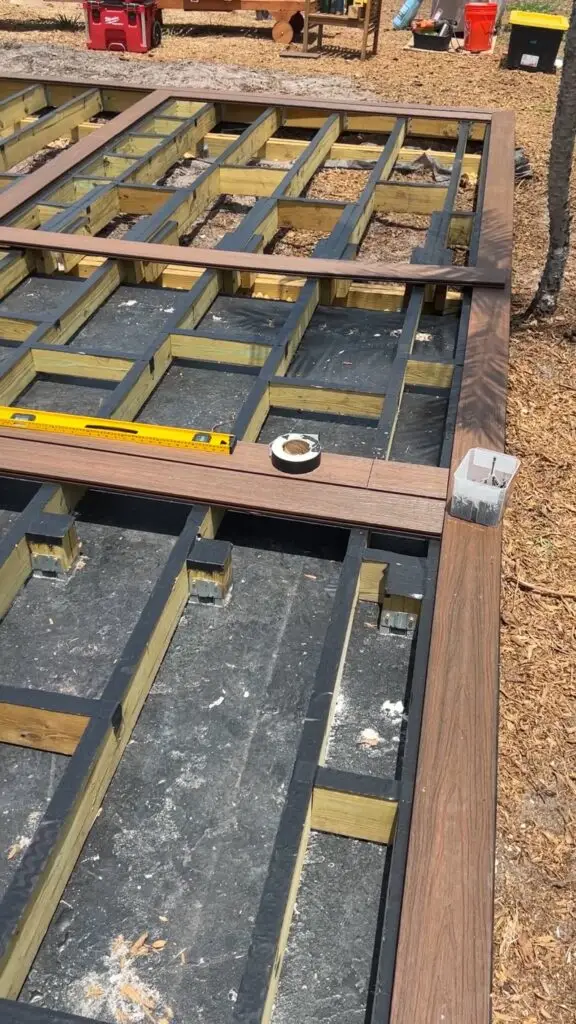
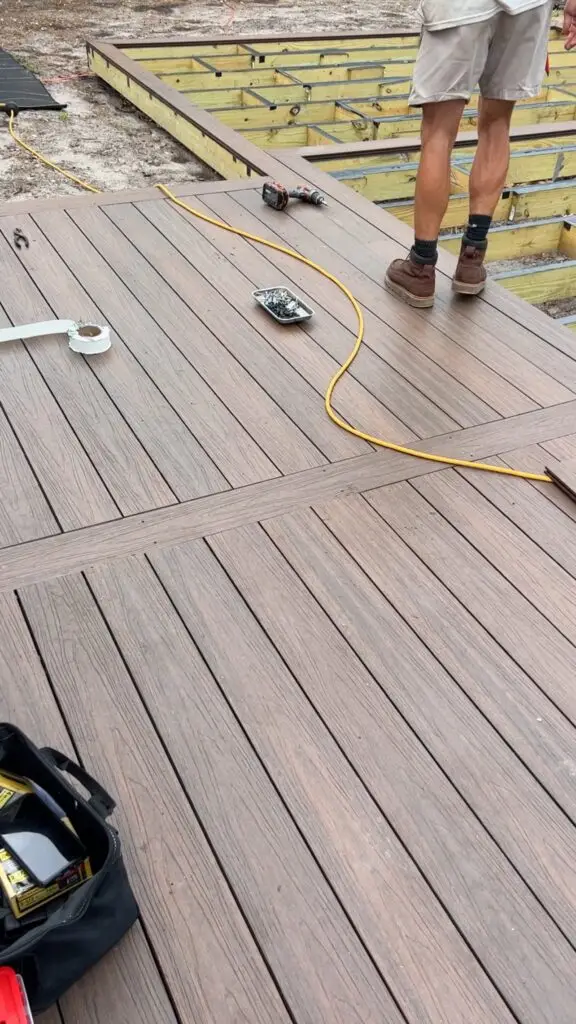
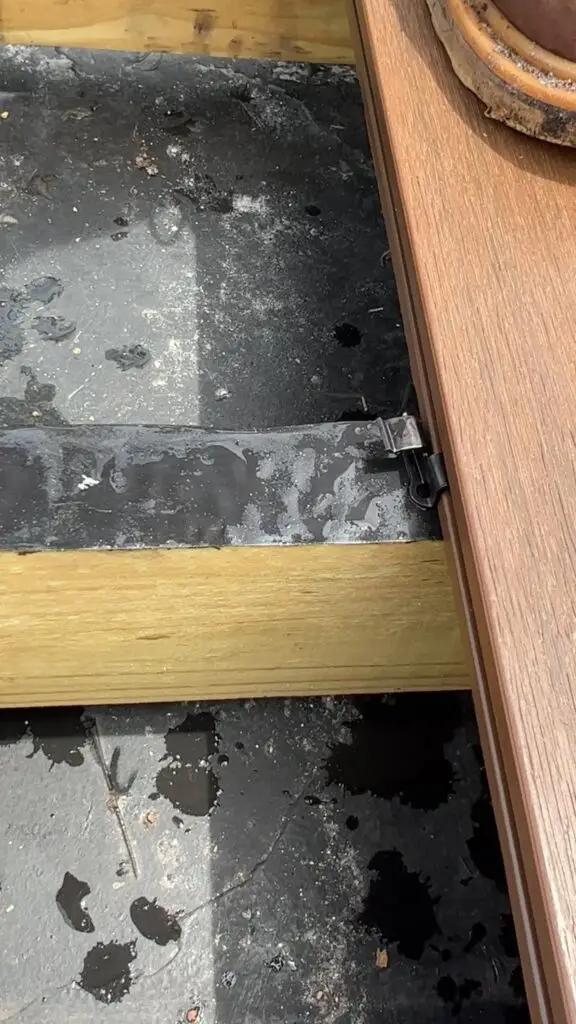
Per CALI’s installation guidelines, you stand on the board that you are fastening, place the clip on the edge of the deck board and on top of the joist that the deck board will be fastened to. Then, you drive a screw in at a 45-degree angle back towards the board you are standing on. The clips installed on each board are double-sided, so you simply slide the next board underneath the clips from the previous board and then install a new set of clips on the next board.
Composite Deck Screws
We had to use some regular screws to attach the “picture frame pattern” and CALI offers deck screws. These screws are the same coloring as the deck which makes them barely noticeable!
Fascia Board Installation
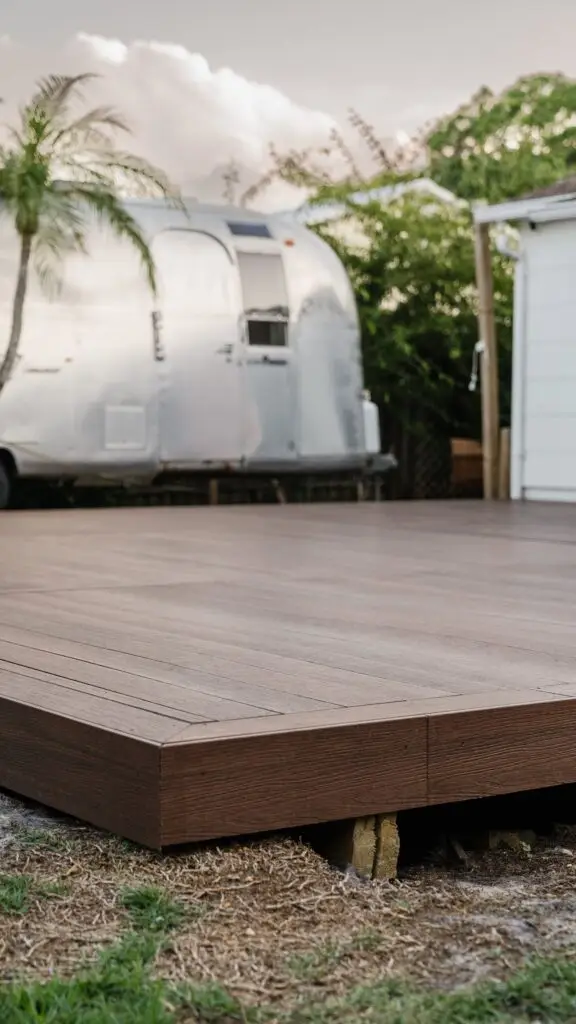
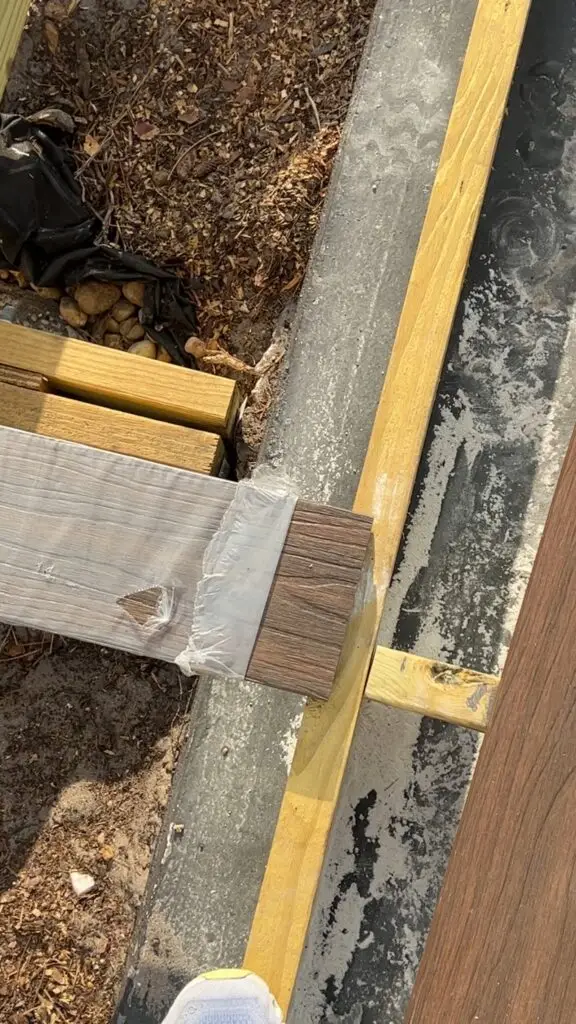
After installing the deck boards, we took measurements for the fascia boards. On the edges of the deck, we measured from the top of the deck boards to the bottom of the deck frame to get the necessary width of the fascia board.

Using a circular saw, we ripped the fascia boards to get the necessary width. We then cut the ends of the fascia boards in a 45 degree angle so that each fascia board matched up correctly at the corners of the deck. The next step was to step back and admire our work!
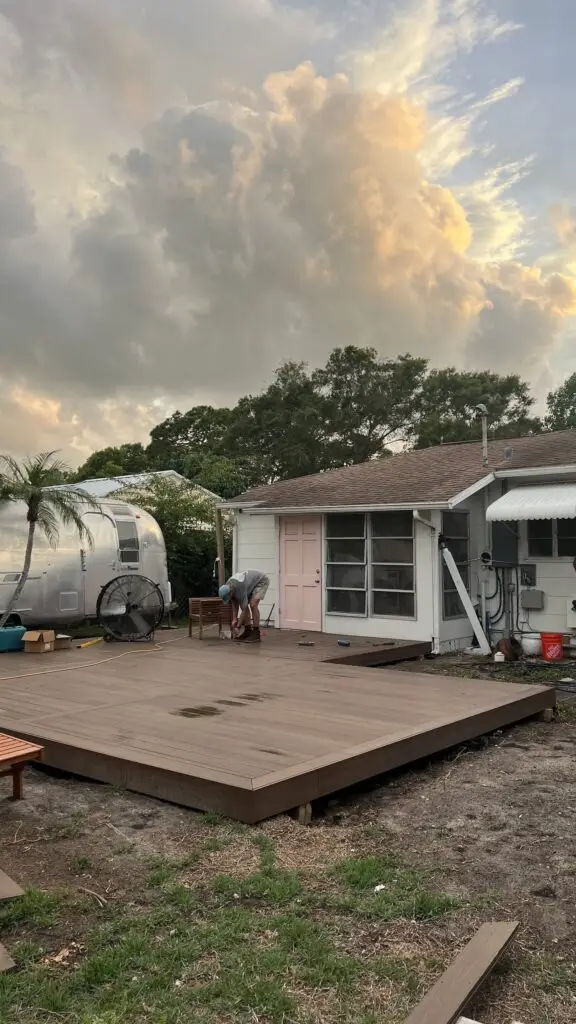
We are so excited this part of the backyard transformation is done and we can’t wait to enjoy our deck once the Florida weather cools down!
