When I first started home design, like most people, I would kind of just go at it. I have learned SO much from doing different projects that required a lot of designing and executing. I am so excited to share the steps I take to make this process run smoothly and to make a vision come to life. Although applying these steps to our friend’s primary bedroom makeover, these steps can be applied to any of your rooms or projects!
Step 1: Define Your Space
- Start by defining the purpose of the room. Is it a relaxation zone, a productive workspace, a gathering area, or a combination of functions?
- Consider the size and layout of the room, as well as any existing furniture or features you want to keep.
- Consider the room’s size, layout, and existing features that you want to incorporate into the new design.
- Take measurements of the entire room: each wall, ceiling height, window length, space in between the window, etc.
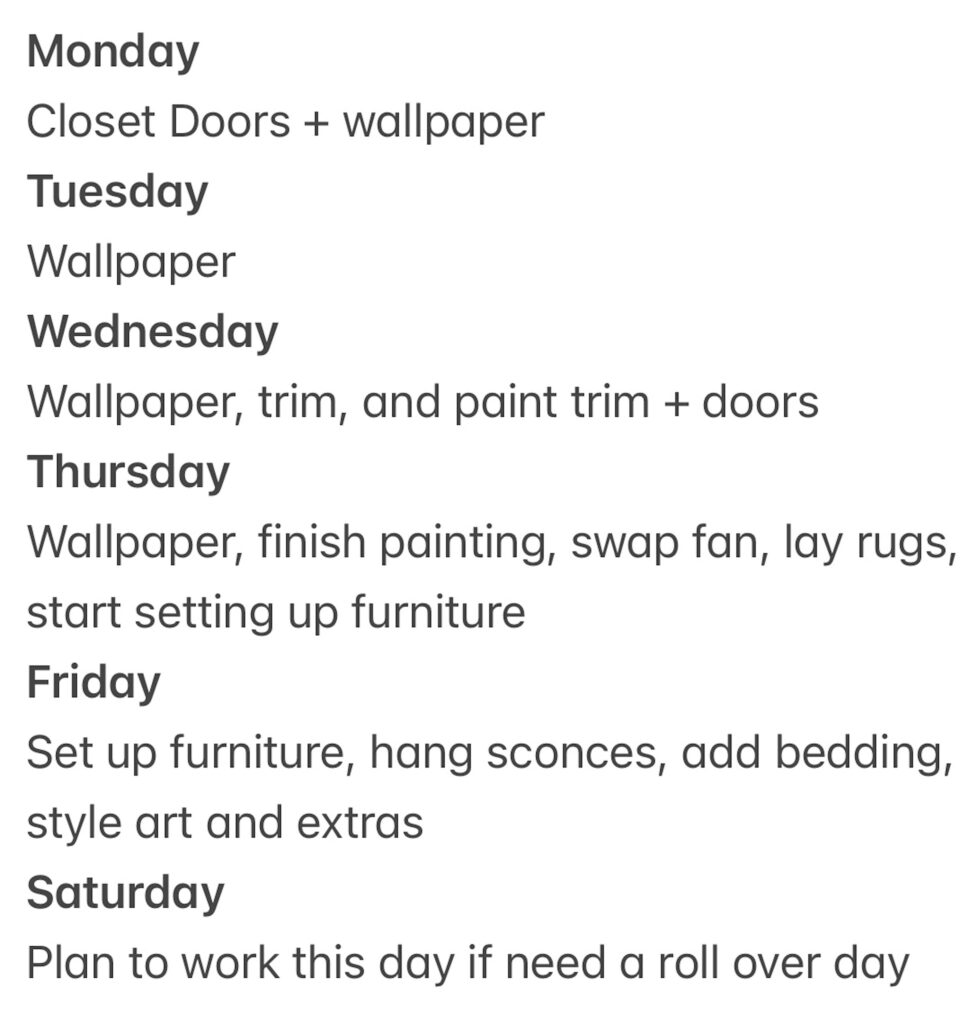
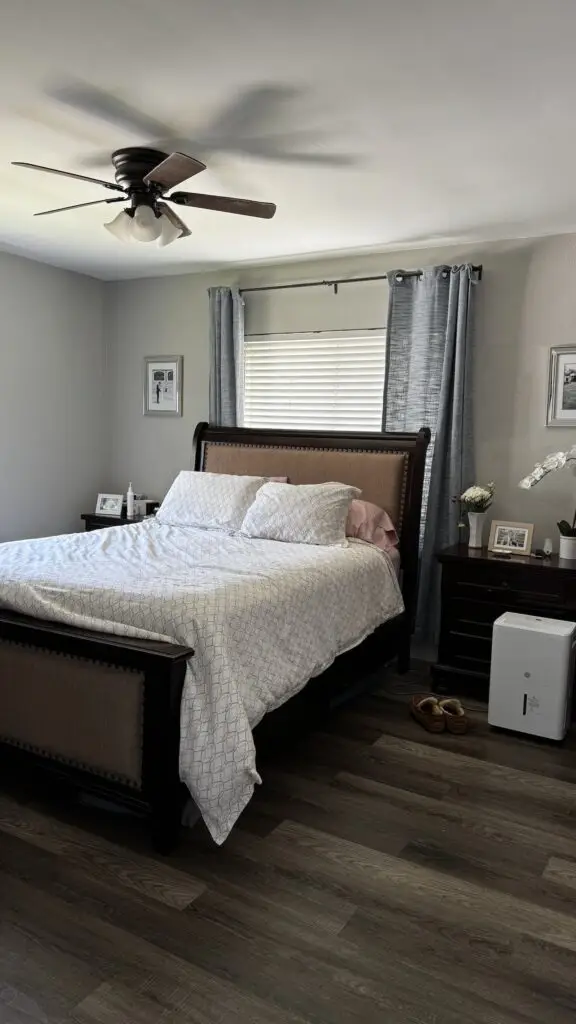
Our current project is centered around the primary bedroom of my adorable friend, Kelly. At the moment, it’s quite plain and lacks cohesion. Before settling on a design, I made sure to take thorough measurements of the room. This step is crucial, as these measurements will frequently be referenced throughout the design process.
Step 2: Decide on Style and Design
- Choose a design style that complements your aesthetic and reflects your personality.
- Decide how you want the room to feel
- Do your research on the style and get inspired
- Integrate the design elements such as colors, furniture, and decorations that define the chosen style and feeling you decided on.
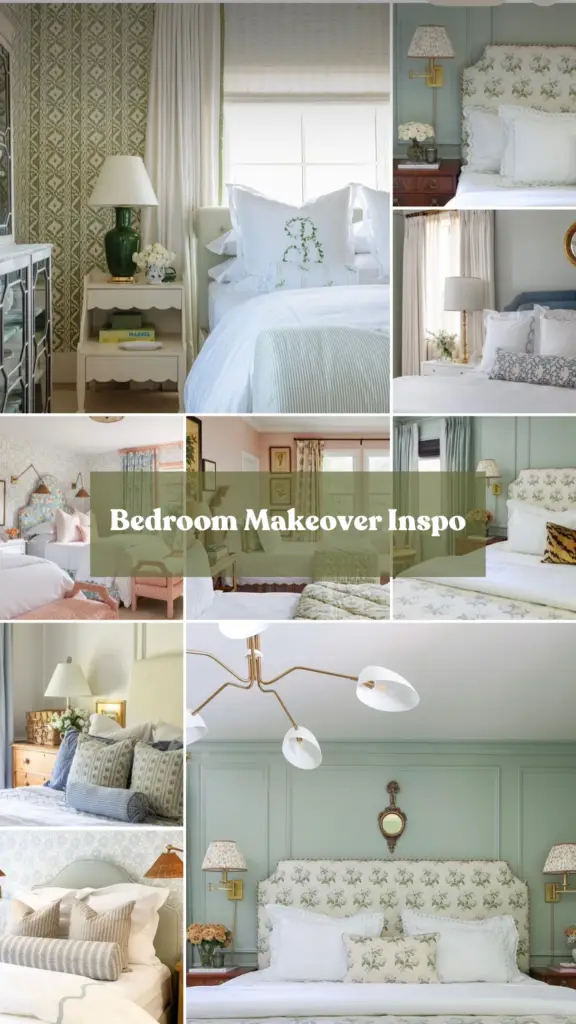
I started by thinking about my friend. She is a classy girl with the best southern energy. So we wanted to make it traditional with a Blushing Bungalow touch, of course. With this decision in mind, I thought of what makes a room traditional and classy. The theme Bridgerton, the regency Netflix show, came to mind. I got so excited about this and made sure to do my research on what goes into a “Bridgerton room.” Looking for color schemes, furniture styles, and decorative elements.
Step 3: Make a List of Tasks
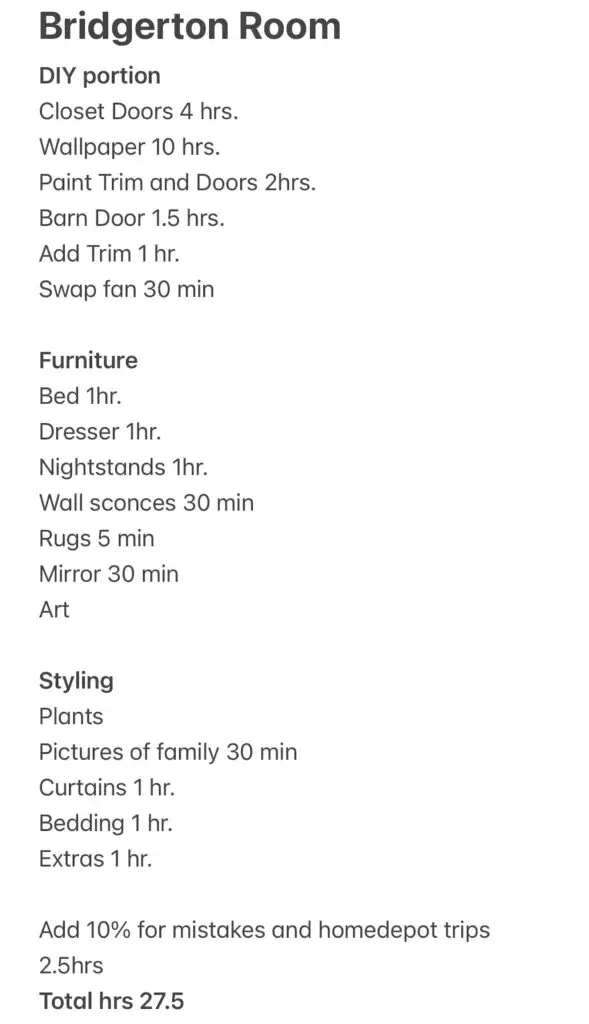
- I like to break up the tasks into categories: DIY portion, furniture, and styling.
- Write down everything that will need to be done in each category. More specific the better!
Don’t skip this step! Creating a tasks list will help you stay organized and focused throughout the process. It is easy to overlook a task when doing a project, understandably, as there is a lot that goes into it. When I go to bed at night, my current projects run wild in my head. I usually end up having a task that I have forgotten about pop up. I hurry and pull out my list and write it down, because chances are in the morning I won’t remember. Having a list makes the re-decorating process more fun, rather than stressful.
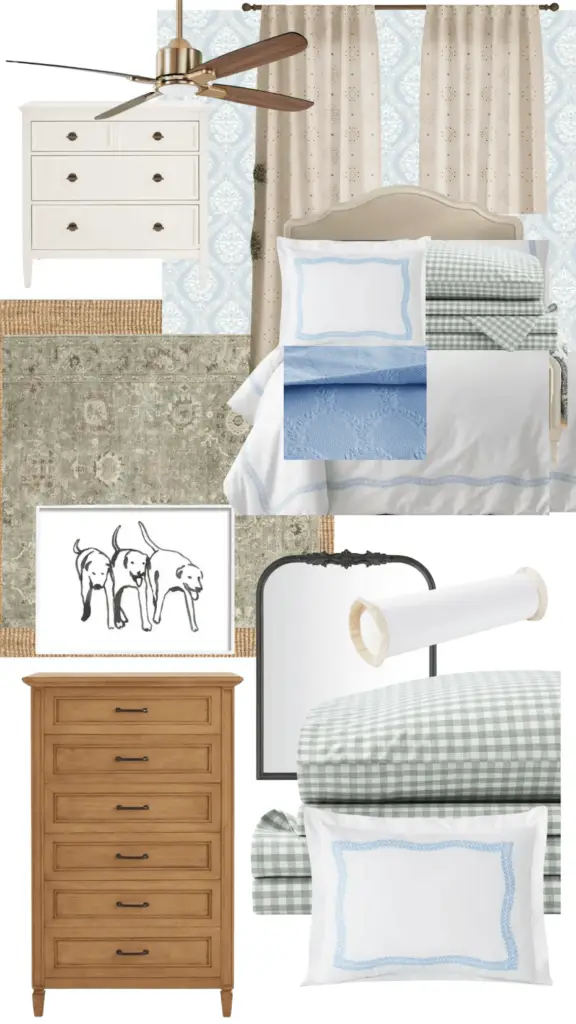
Step 4: Create a Mood Board
- Gather inspiration from magazines, websites, and social media platforms like Pinterest.
- Include color swatches, fabric samples, furniture ideas, and decorative accents on your mood board to help visualize how the room will come together.
Anyone who knows me knows I LOVE mood boards. They are the most underutilized tool when doing a home project. I am telling you with all my heart… once you do this you will never go back. I use the app Canva, but you can use whatever method you prefer. I love to swap items in and out until I feel like I have found the right “fit.” This saves me time and money so I don’t have to keep returning items and testing them out in the room.
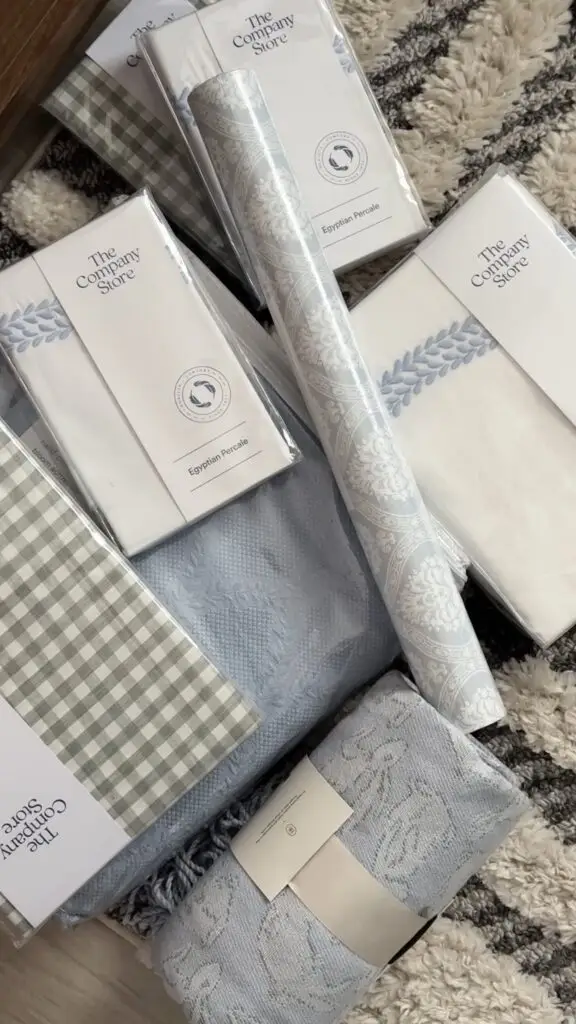
Step 5: Order Products and Supplies
- Use your mood board as a guide to start ordering furniture, bedding, curtains, rugs, paint, and other materials needed.
- Consider delivery times and availability to ensure everything arrives on schedule.
- Make notes of all the tools that you will need for DIY projects, hanging curtains, putting together furniture, etc.
I like to order everything in advance so that way I don’t have to keep waiting for various delivery times while I am putting the space together. Applying this tip to our current project, my friend’s bedroom makeover, has been especially convenient. I want to make the best use of my time while I am at her house. She has been so excited to see her room, I don’t want to make her wait any longer than she needs to!
Step 6: Create a Reasonable Schedule
- Develop a realistic timeline for completing each task, taking into account your availability and the complexity of each project.
- Allow extra time, I say about 10%, for unexpected delays, adjustments to the plan, and of course Home Depot trips.
- After figuring out how much time it will take you, make a schedule and a task list for each day
I love having a schedule! It helps me realize all the progress we have made, especially if the project goes south. Plus, it keeps me accountable and on-task to get the project done by my goal date.
