Today is an exciting day because I finally get to share with you the final reveal of our friend’s updated, modern kitchen with brown granite countertops. When I undertook this project, I decided that I really wanted to show you how you can work with the space that you have by making small but impactful changes!
We did a similar kitchen refresh in our own home, so taking on another kitchen that looks so different was so fun and I knew I was up for the challenge. You don’t need to spend tons of money to love your home, and this kitchen transformation with dated brown granite countertops proves just that!
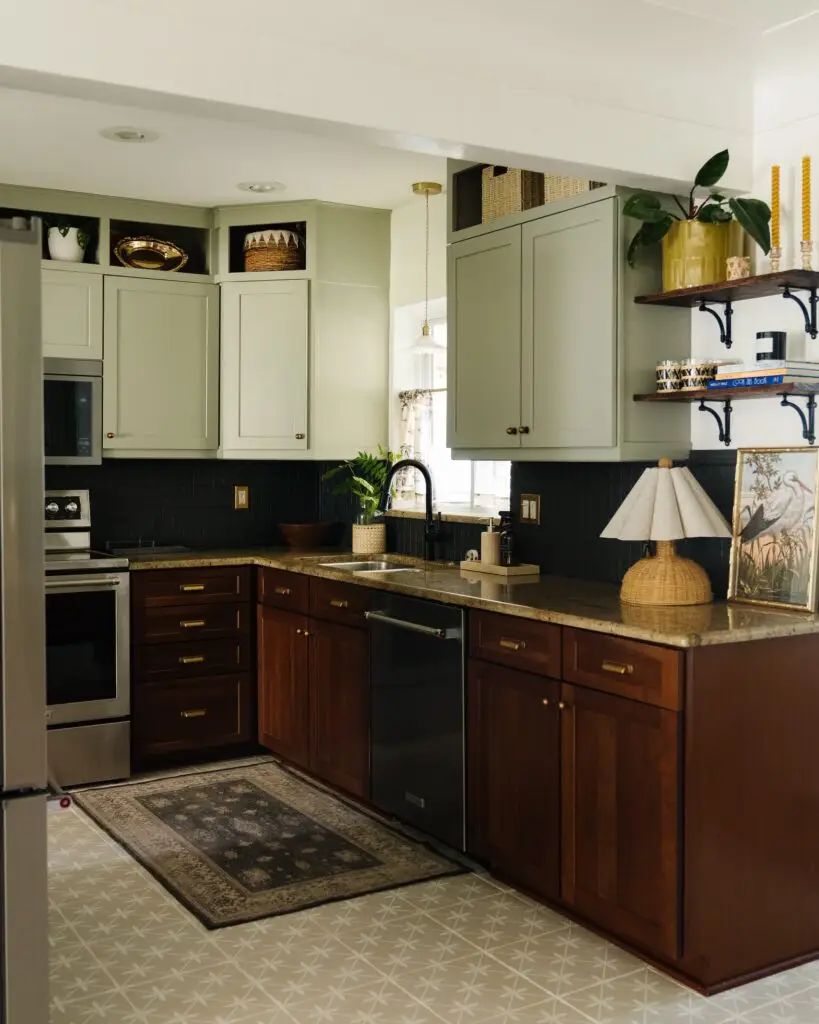
LAMP (SIMILAR) | RUG | YELLOW CANDLES | FAUCET | PENDANT LIGHT | PULLS | KNOBS | SHELF BRACKETS | CURTAIN ROD | CURTAINS | WICKER BASKETS | BRONZE WALL PLATE | TILE
How To Update a Kitchen with Brown Granite Countertops
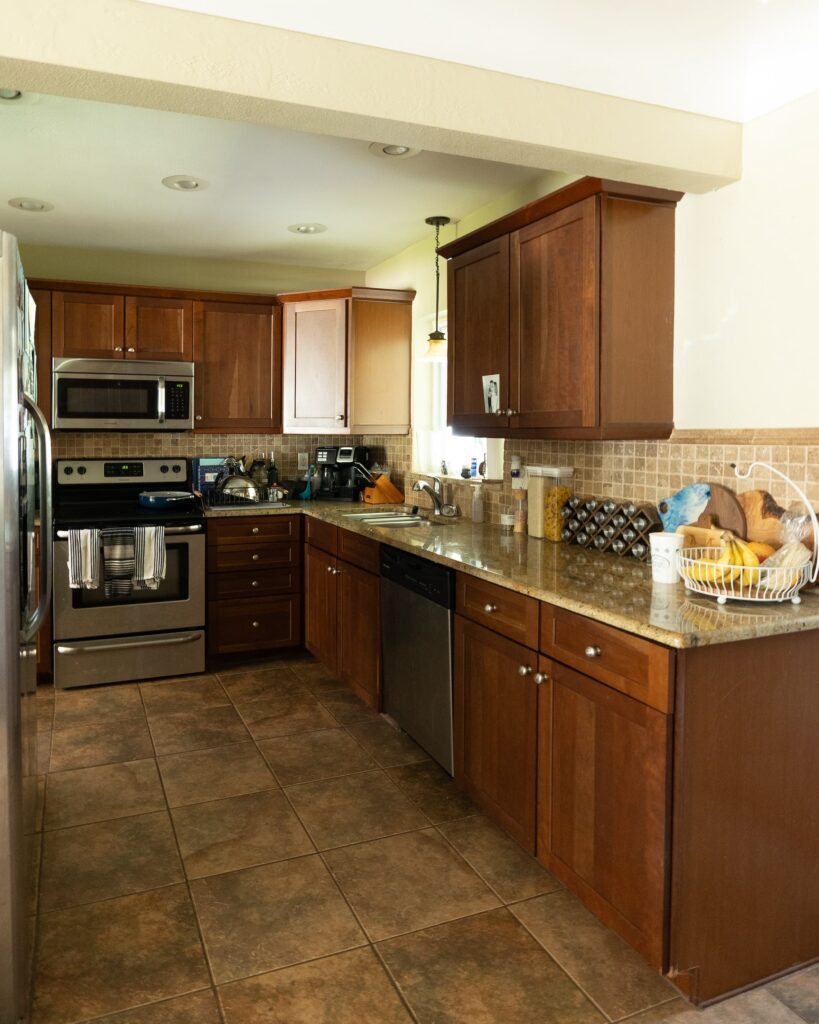
Step right into the “before” of this kitchen, where brown reigned supreme in all its glory! Brown floors, brown countertops, brown backsplash—you name it, brown was there to greet you. Sticking to a limited budget, I knew we weren’t going to be able to replace the dated brown granite countertops, but I had a few ideas to work with the counters, not against them.

I’ve seen many people attempt to update granite countertops by painting or using epoxy, but honestly that’s never ideal. Granite countertops are durable and made from natural materials. Personally, I feel that painting granite countertops for cosmetic reasons diminishes the overall quality of the space. While it may improve the appearance, paint is more likely to chip and degrade, eventually making the space look dingy.
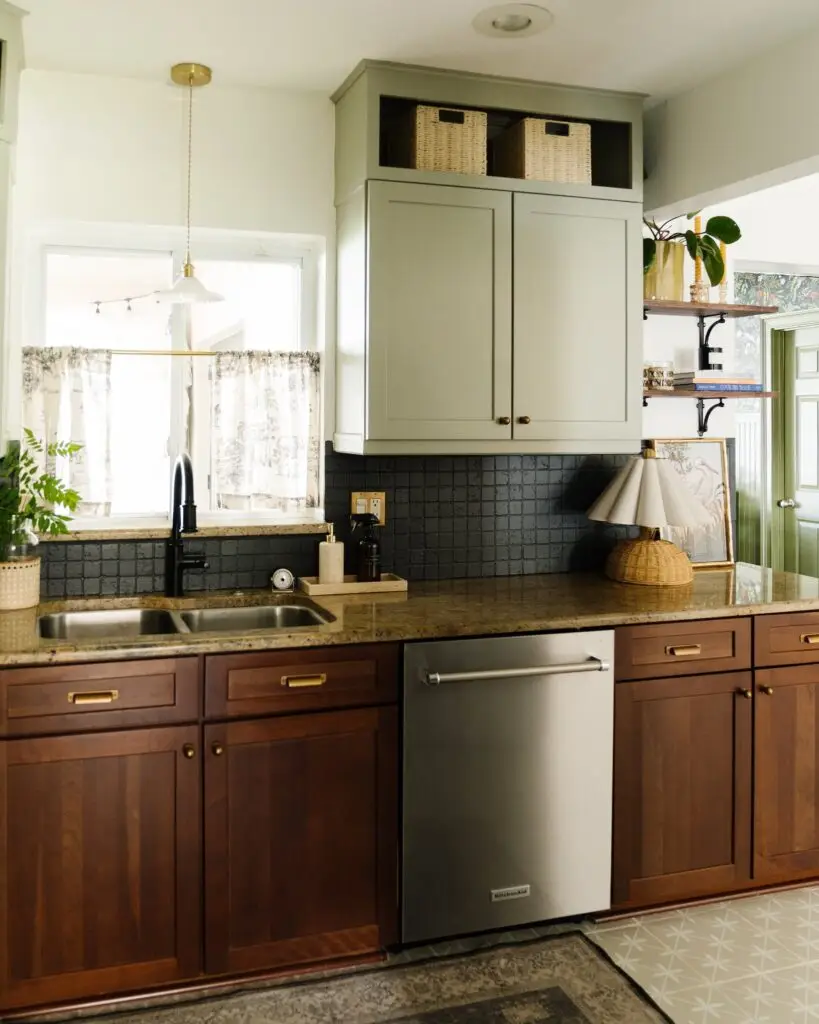
But hold on a minute! Just because brown granite countertops might be considered a bit “dated” doesn’t mean they’re down for the count. Brown is making a comeback! But that’s neither here nor there. Working with natural stone gives you an advantage if the rest of the kitchen is adjusted to complement this feature.
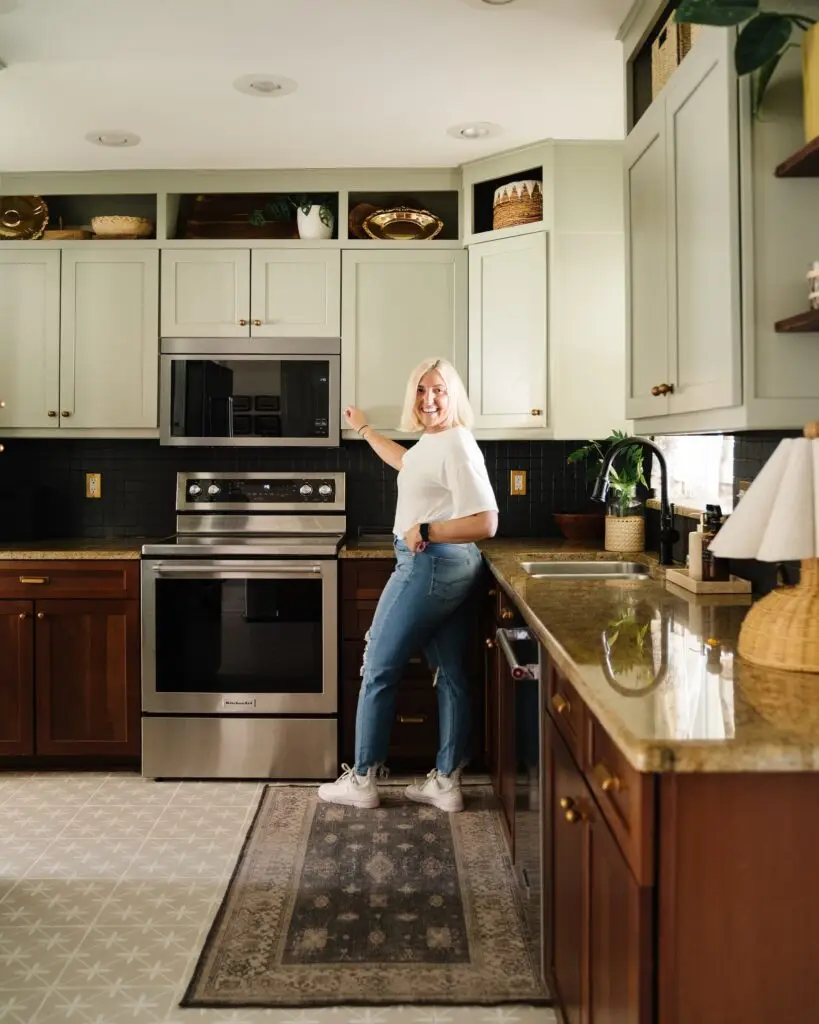
Update your Appliances
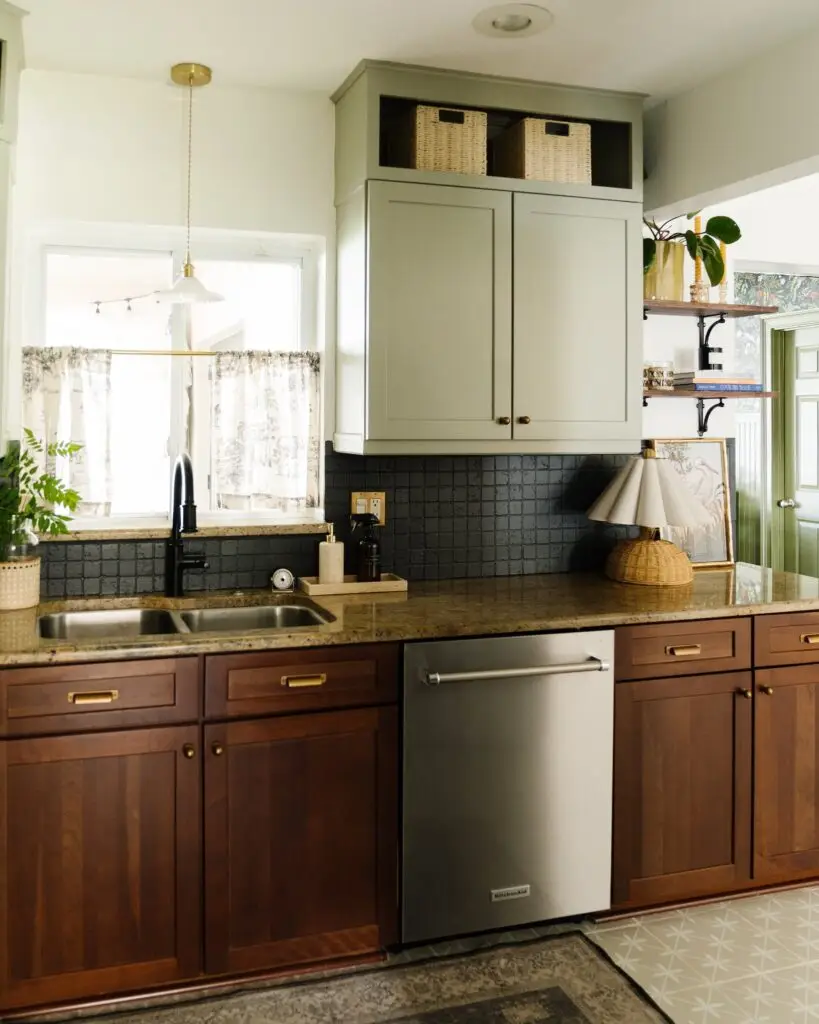
The real stars of the show are the premium appliances! These KitchenAid appliances are absolutely gorgeous and truly elevate the overall feel of this kitchen to a designer level.
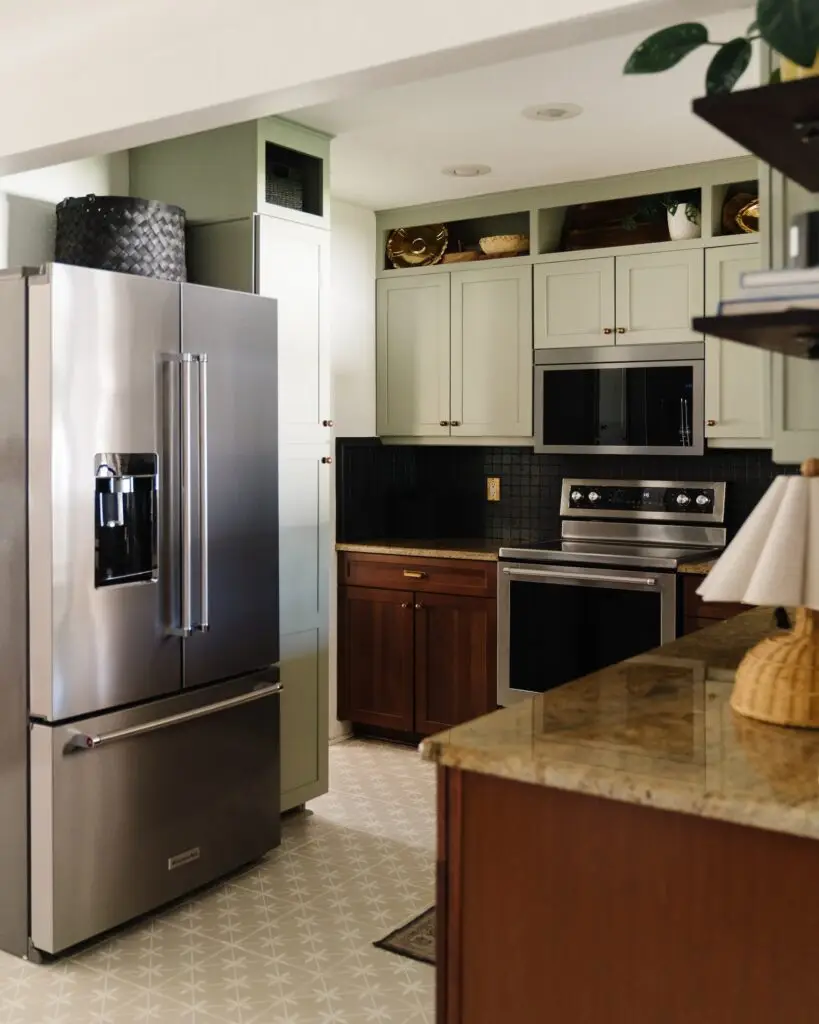
I wanted to demonstrate how investing in high-quality appliances can enhance the entire space, while also sharing DIY and money-saving tricks. While you can’t DIY your own refrigerator, you can certainly spruce up the rest of the space with paint, patterns, and easy swaps. Plus, we have KitchenAid appliances in our own home and love love love them!
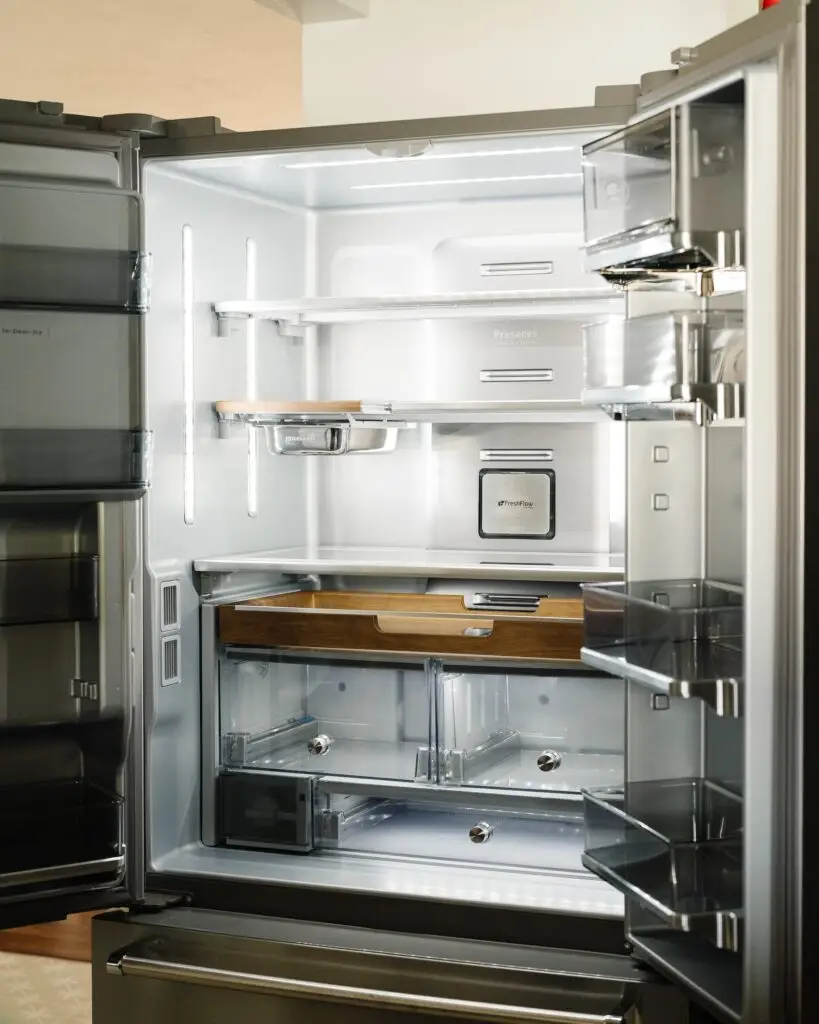
The Counter-Depth French Door Platinum Interior Refrigerator with PrintShield™ Finish is stunning and has a finish that resists fingerprints on the outside. It also has tons of flexible storage options on the inside.

This dishwasher in PrintShield™ Finish with FreeFlex™ has a third rack that fits glasses, mugs, bowls, silverware and cooking tools, freeing up room below for pots, plates and mixing bowls.

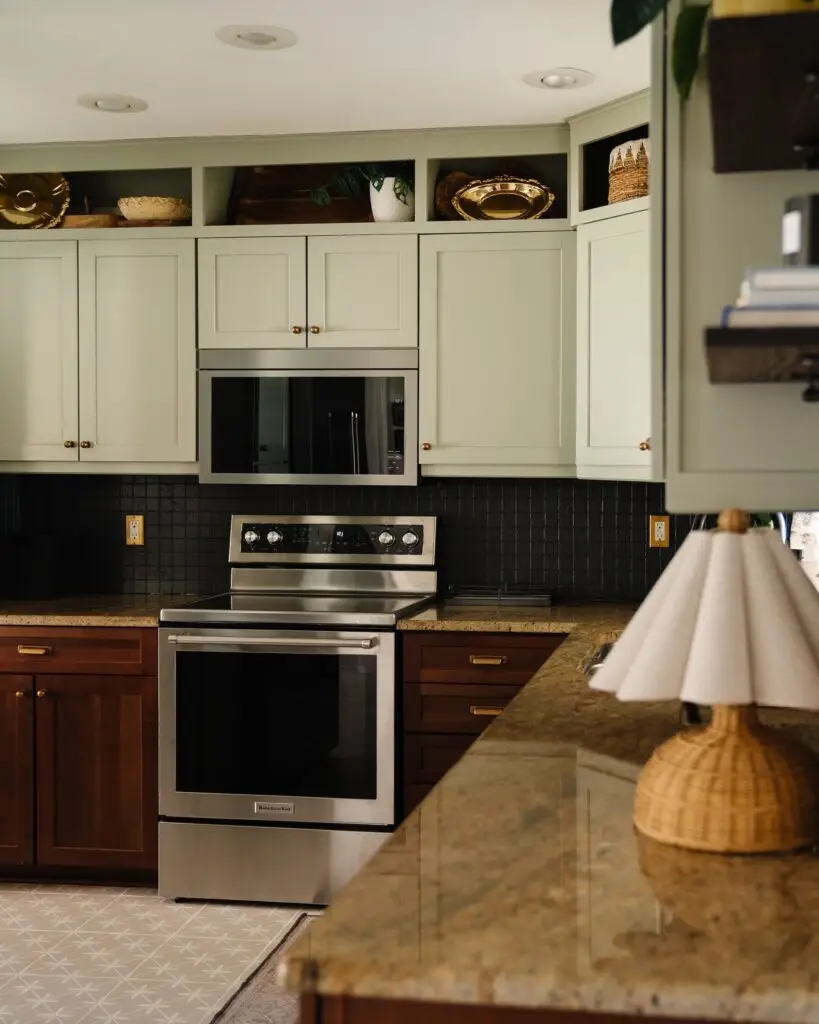
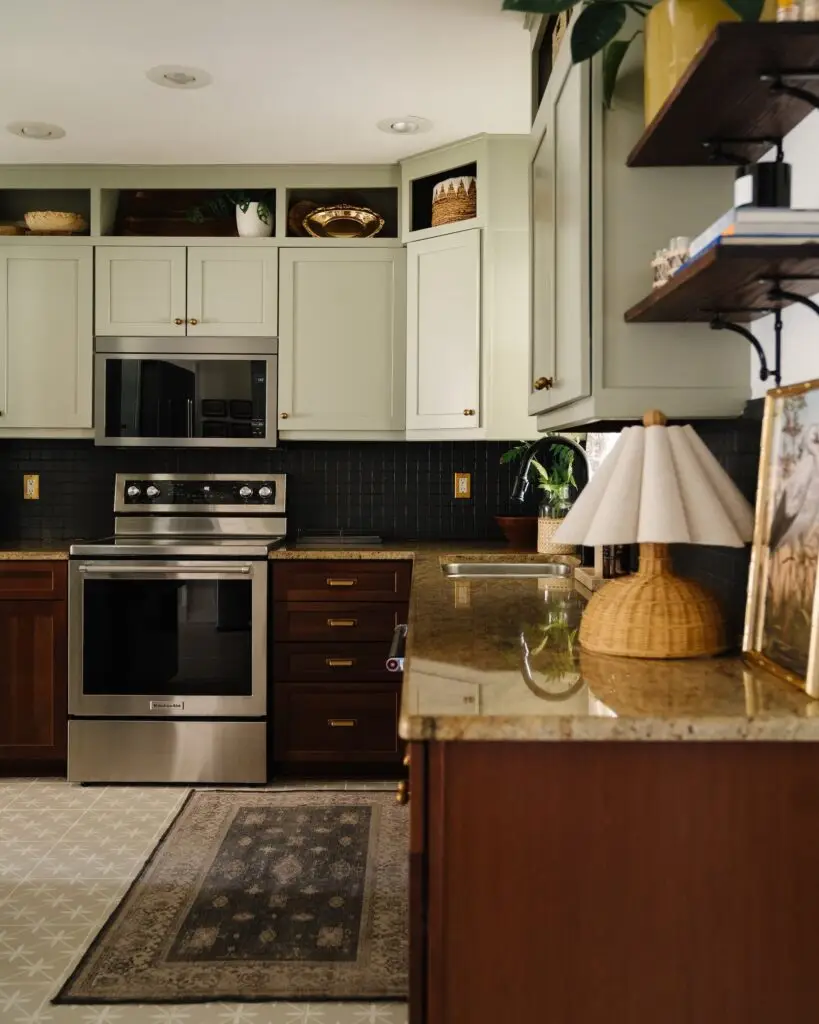
We opted for the 30-Inch 5-Element Electric Convection Range which is a freestanding range that produces flawless cooking results with Even-Heat™ True Convection and the cooktop features five heating surfaces. Above the range is the Over-the-Range Microwave Oven with Flush Built-In Design which looks so sleek and fits evenly with cabinets to give your kitchen a seamless look and feel.
Brown Granite Countertops What Color Cabinets
When designing this kitchen, I was adamant about incorporating a specific color scheme. Two-toned cabinets were the perfect choice due to their current trendiness.
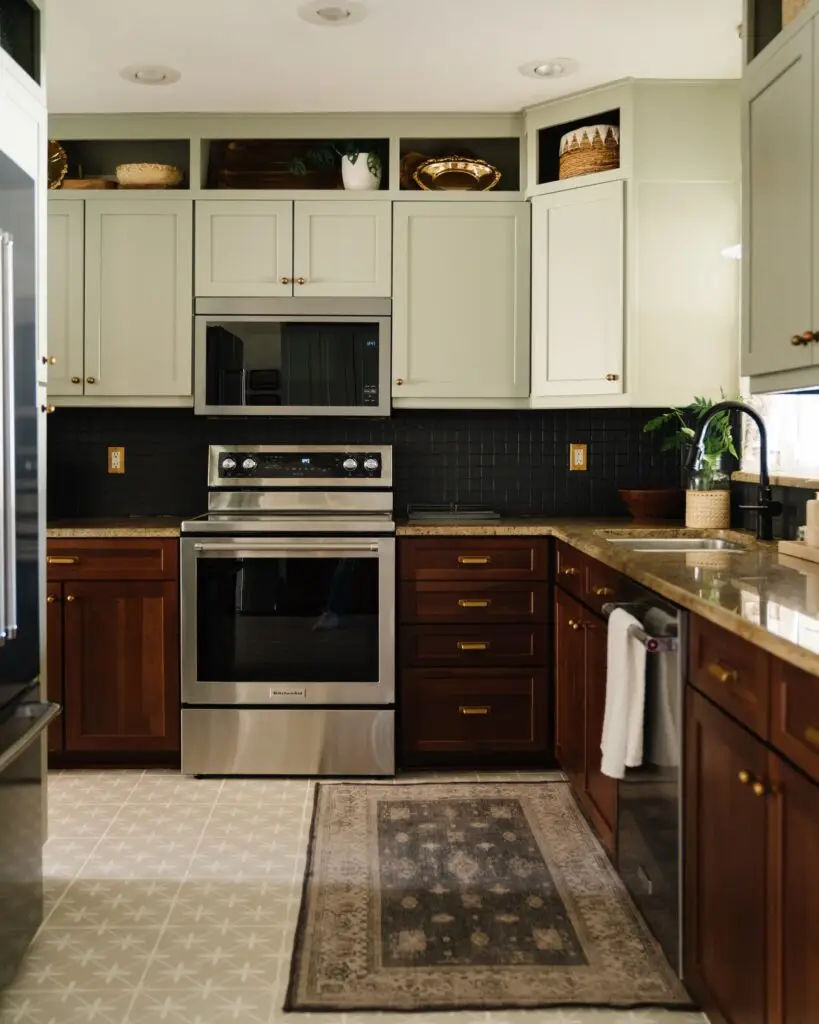
I was keen on maintaining a neutral color palette in this space, opting for shades of green, brown, black, and cream. The primary challenge was to seamlessly blend the countertops into the design, given their earth-tone brown color. I kept the rest of the design consistent with other earth-tone colors to achieve this. This approach ensured a cohesive look throughout the kitchen.
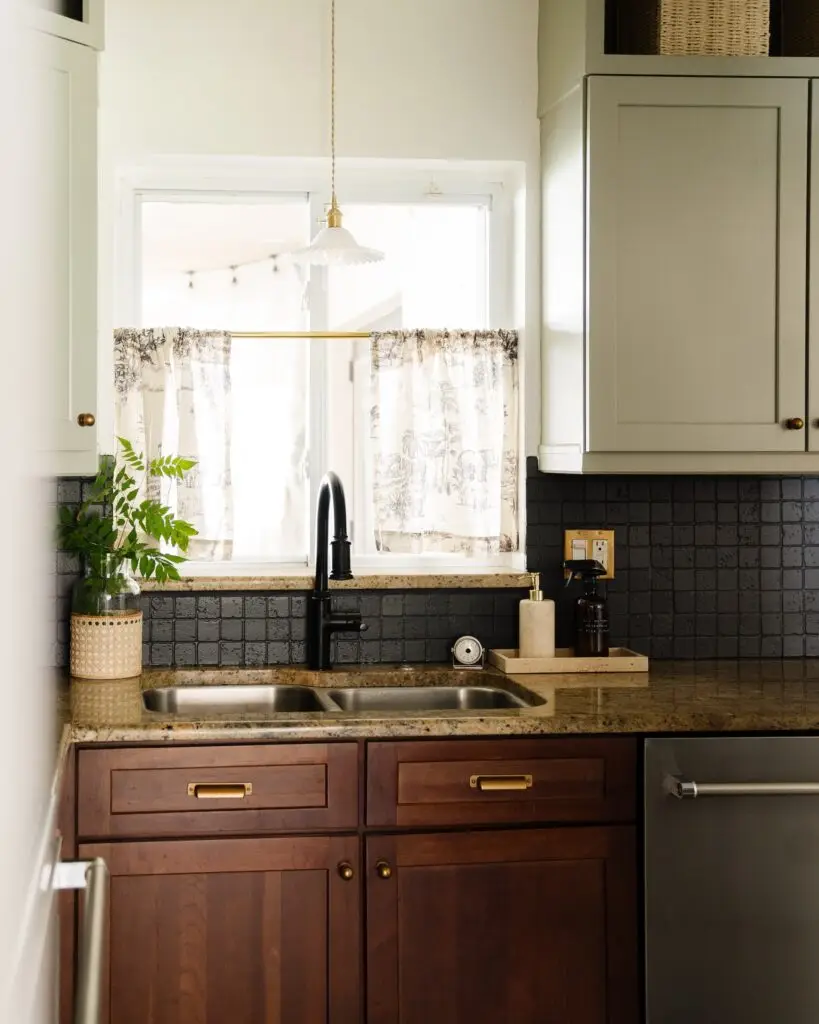
Extending your Cabinets to the ceiling
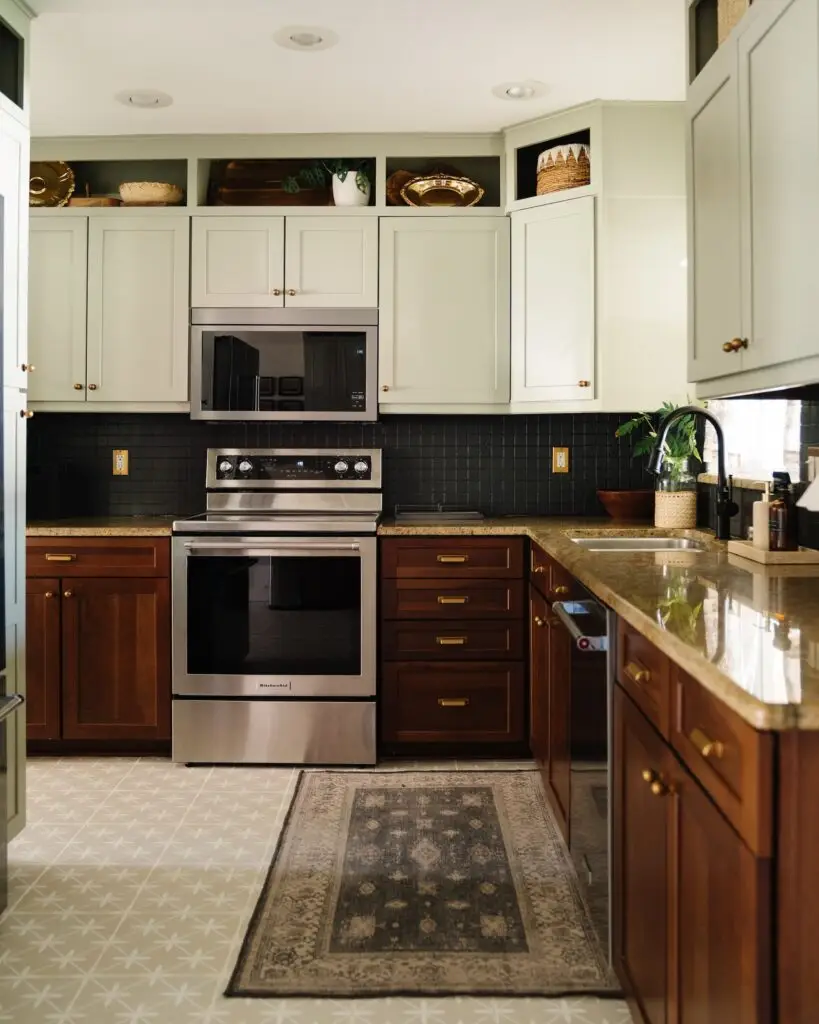
Starting with the top cabinets, I aimed to extend them to the ceiling, leveraging the existing cabinets in the kitchen. This added space and storage, enhancing the kitchen’s modern look while creating a sense of spaciousness.
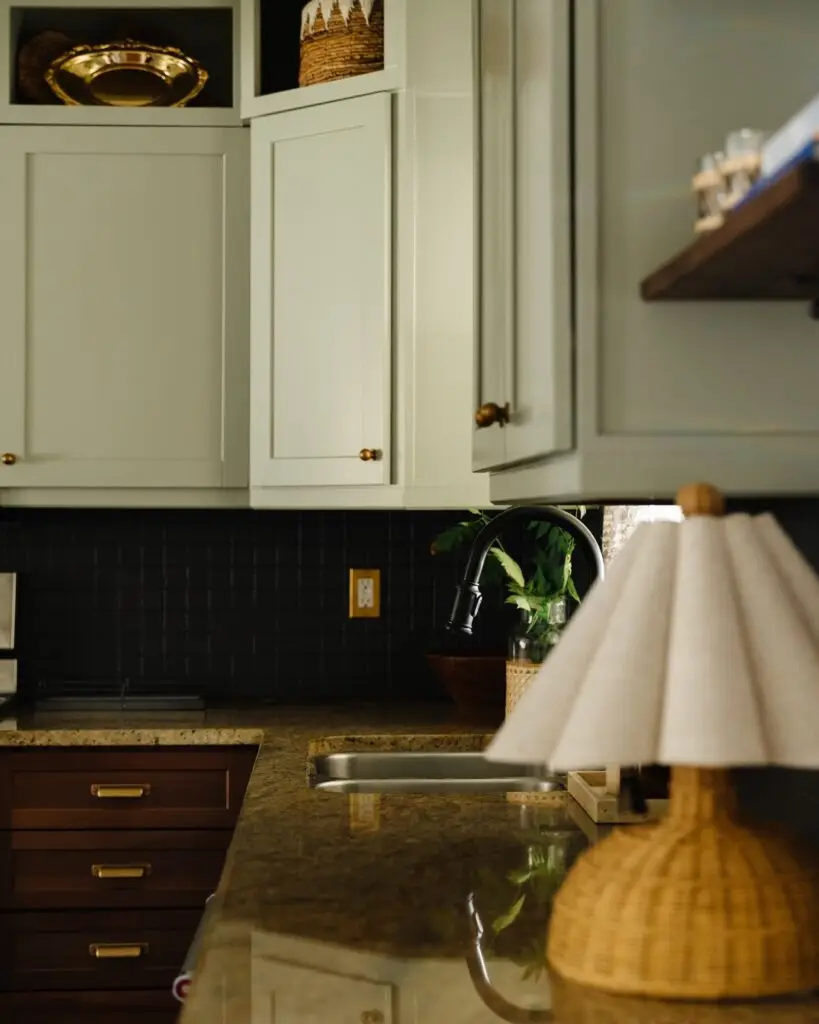
Extending the cabinets meant I had to paint them. Since I couldn’t replace the dated granite countertops, I left the bottom cabinets as they were. The contrast of creamy, earthy green upper cabinets with natural wood below helped integrate the countertops seamlessly into the design.
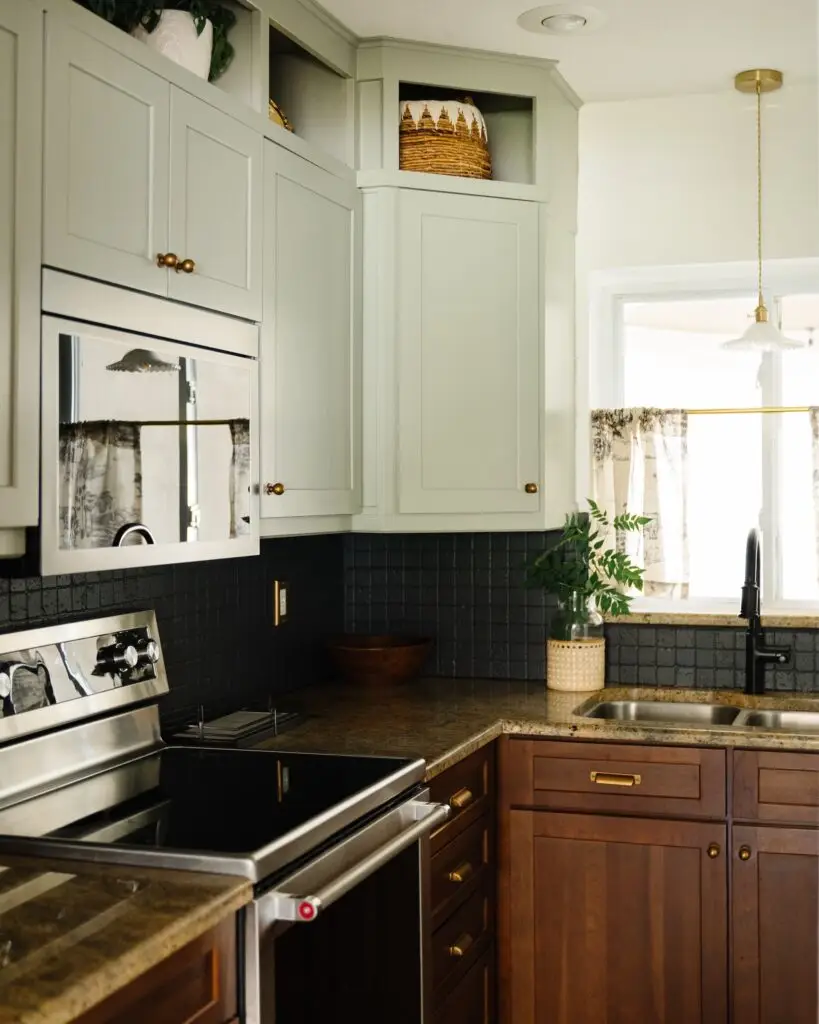
I was set on maintaining a neutral color palette in this space, opting for shades of green, brown, black, and cream. Since the primary challenge was to make the countertops blend seamlessly into the design, given their earth-tone brown, I kept the rest of the design consistent with other earth-tone colors. This approach ensured a cohesive look throughout the kitchen.
The color of the upper cabinets is called “Jungle Camouflage” by Behr Paint. Honestly, it’s one of the most foolproof colors on the market. Note! We did paint the walls in the kitchen my favorite white color! “Whisper White” by Behr Paint.
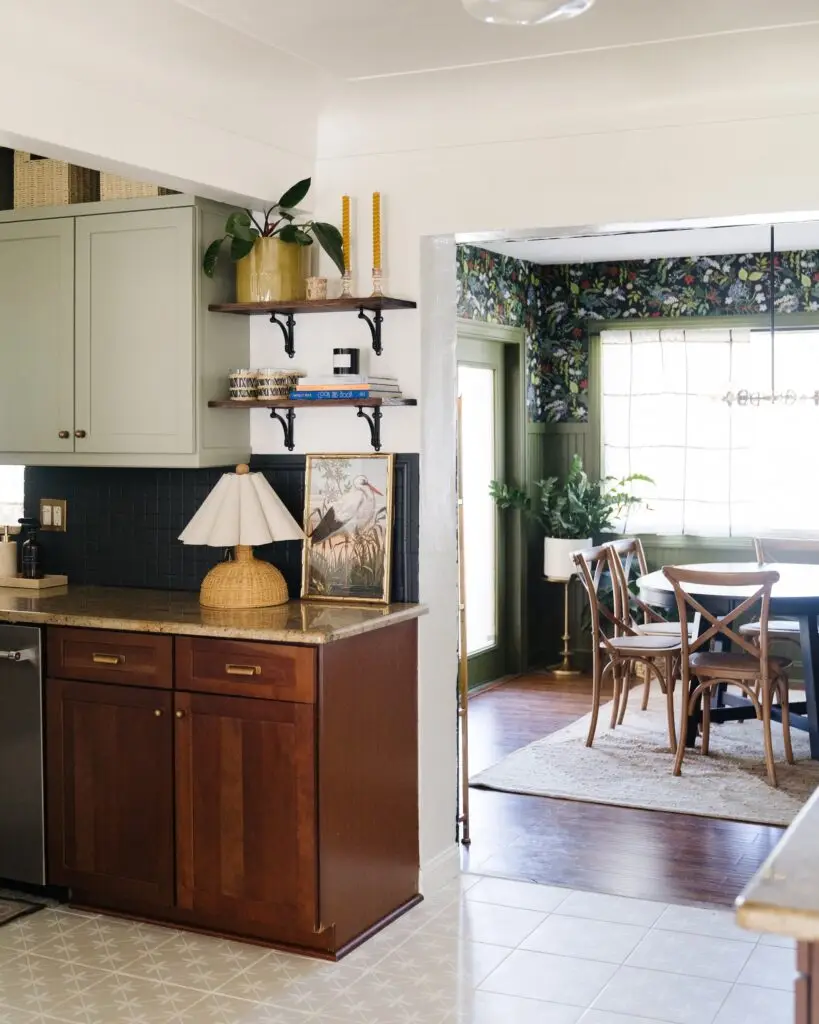
What Kind of Paint do you use for Backsplash?
Painting the current backsplash proved to be the most cost-effective way to make a significant impact in this kitchen design. It’s relatively easy to paint kitchen backsplash tile and typically only takes a day or two. We began by priming the backsplash and allowing it to cure for 24 hours. Then, I picked up several paint sample cards from Home Depot and brought them back to the kitchen to find the perfect color.
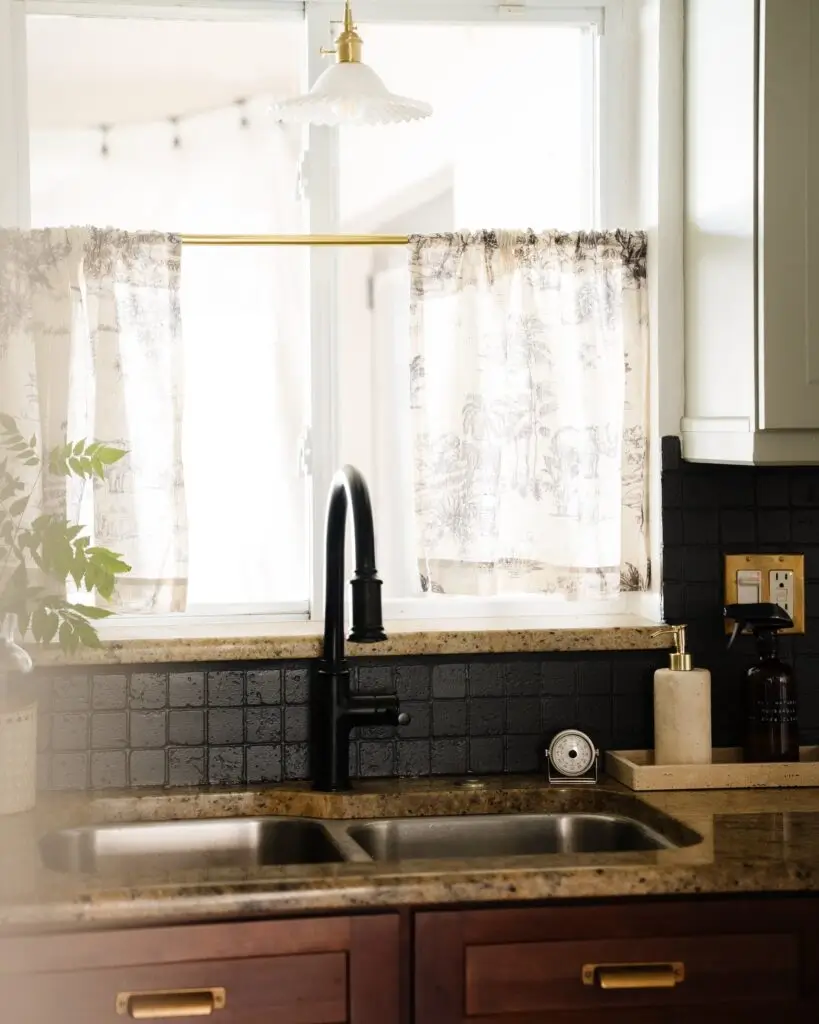
Choosing a color to complement the brown granite countertops was crucial for making them look intentional in the design. The countertops had green and black shades, and since we painted the upper cabinets green, I chose a darker shade from the countertop. Therefore, I went with a soft black color.
After priming the backsplash, we applied a low-luster concrete paint tinted in the color “Satin Black” by Behr.
Swapping Kitchen Floor Tile
When I first laid eyes on this kitchen, I knew swapping the tile was necessary to match the sleek look and feel of the new appliances. While there are other budget-friendly options available, replacing the floor was essential after assessing the entire kitchen.
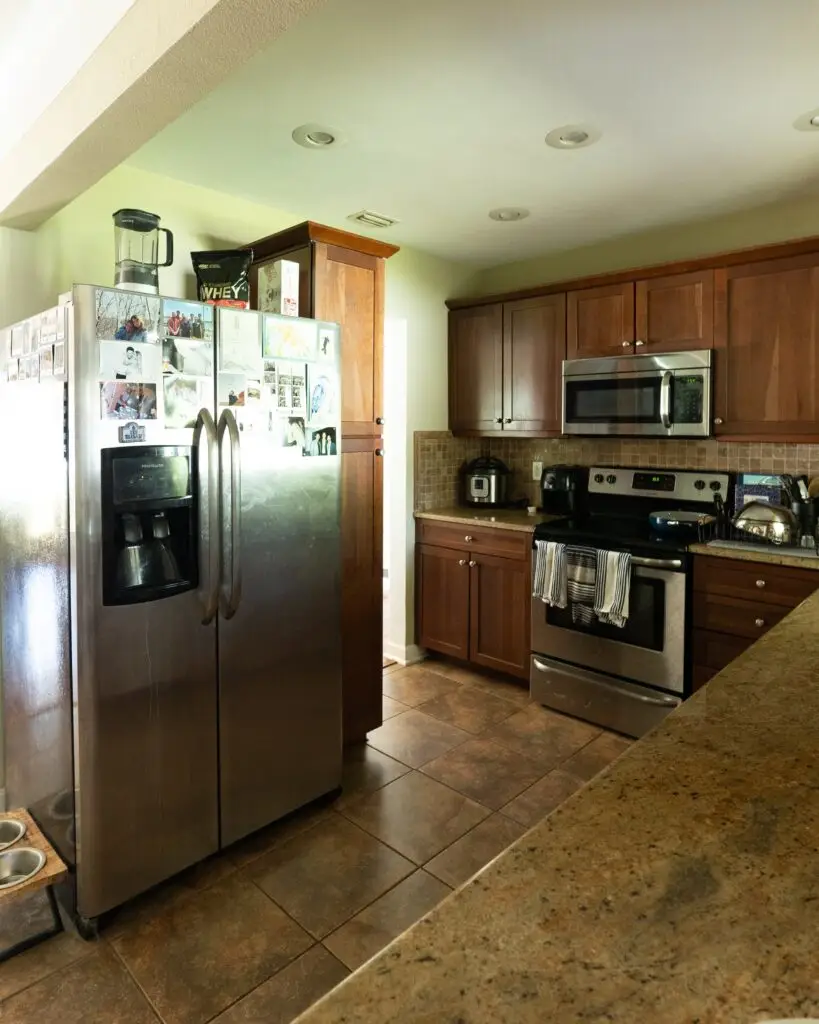
Although painting or using stick-on tiles are alternatives, they may lack the durability needed, especially with dogs and frequent cooking. Therefore, durability was a primary concern.
Moreover, replacing the floor tiles opened up numerous fun possibilities. After careful consideration, we settled on this charming flower-patterned tile. I adore the two-tone colors of the white and beige pattern, which adds a playful touch to the space without overwhelming it. Plus, these tiles were incredibly cost-effective, helping us stay within our budget constraints.

Easy Kitchen Update Ideas with Brown Granite Countertops
The smallest swaps can make the biggest difference! And, of course, we couldn’t complete this kitchen makeover without updating fixtures, lights, and hardware. These are the details that truly bring the space together, giving it a wonderfully cozy and eclectic design.
Hardware, Lights and Fixtures
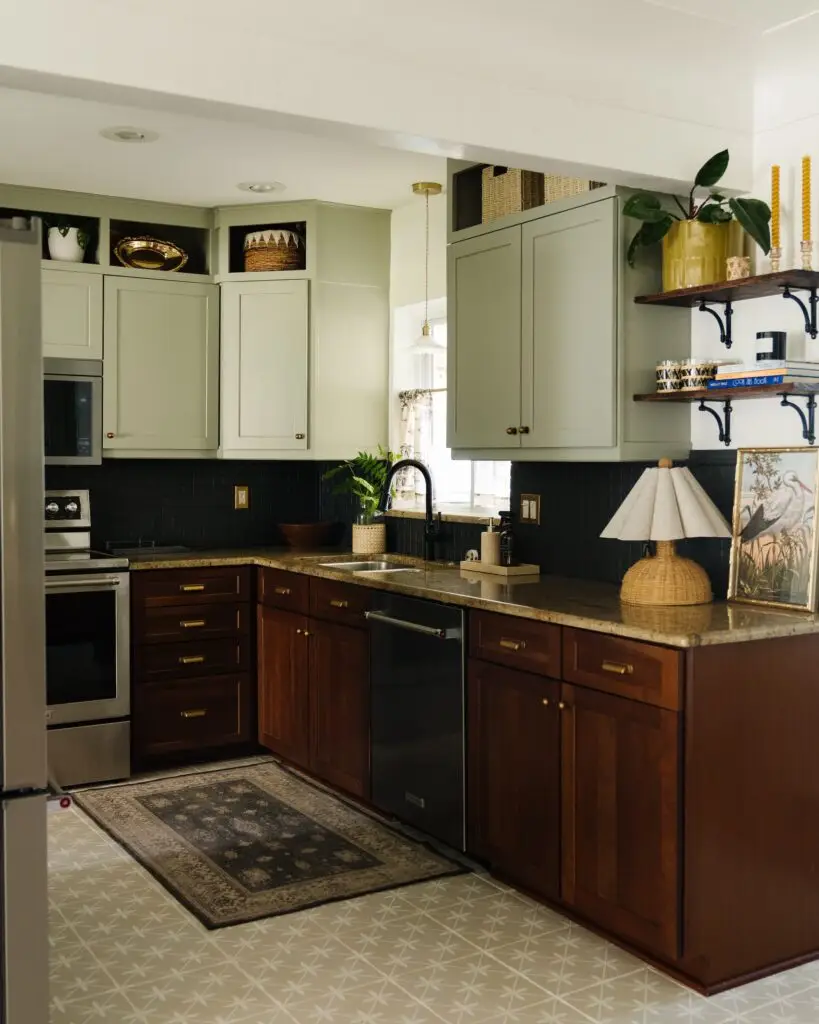
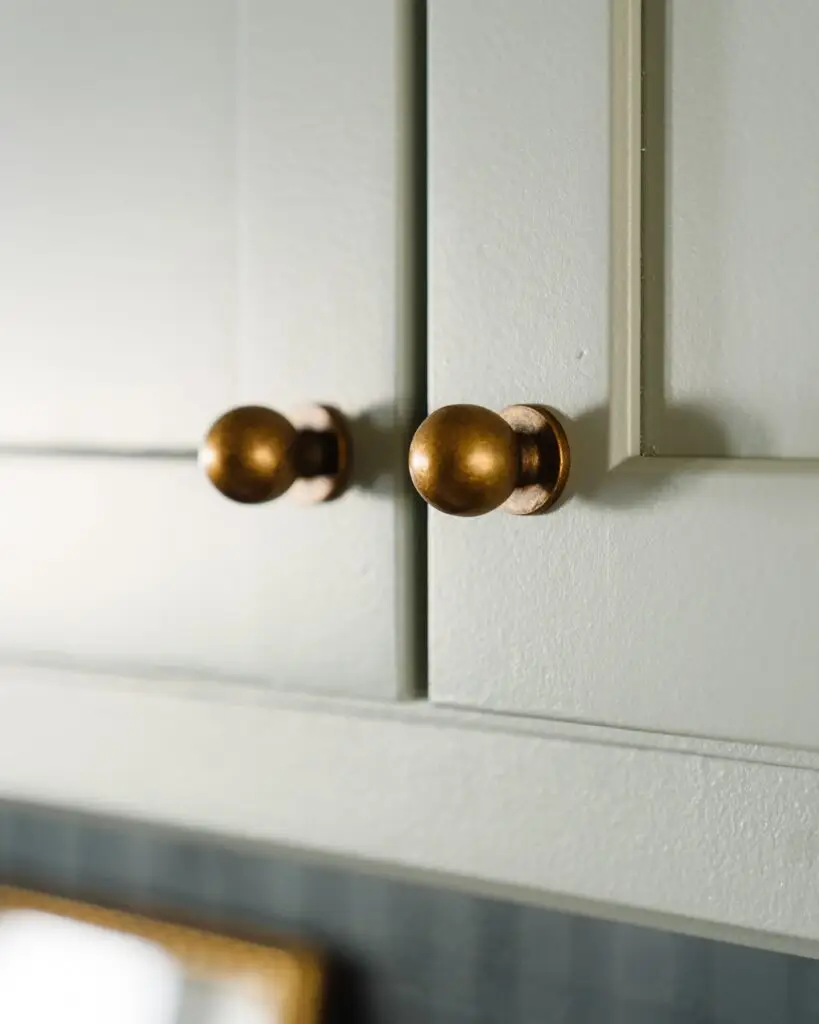
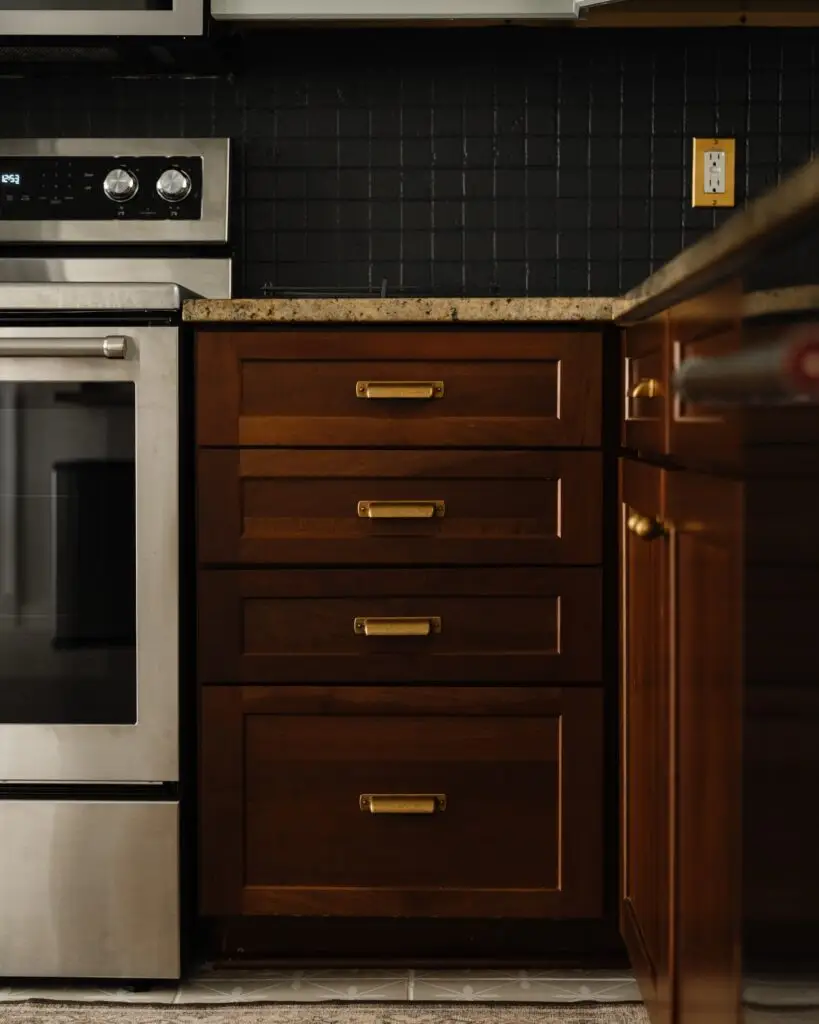
For the hardware, we decided to add pulls to the drawers and cute little round knobs to the cabinets. Using the same hardware on both the upper and bottom two-toned cabinets really makes the space feel cohesive. This hardware, sourced from Amazon, is not only beautiful in person but also comes at an amazing price. You can’t go wrong there.
I swapped out both lights for more vintage-inspired options. When designing a space, I enjoy incorporating both modern and vintage-inspired elements. These pieces contribute significantly to making this space feel like home.

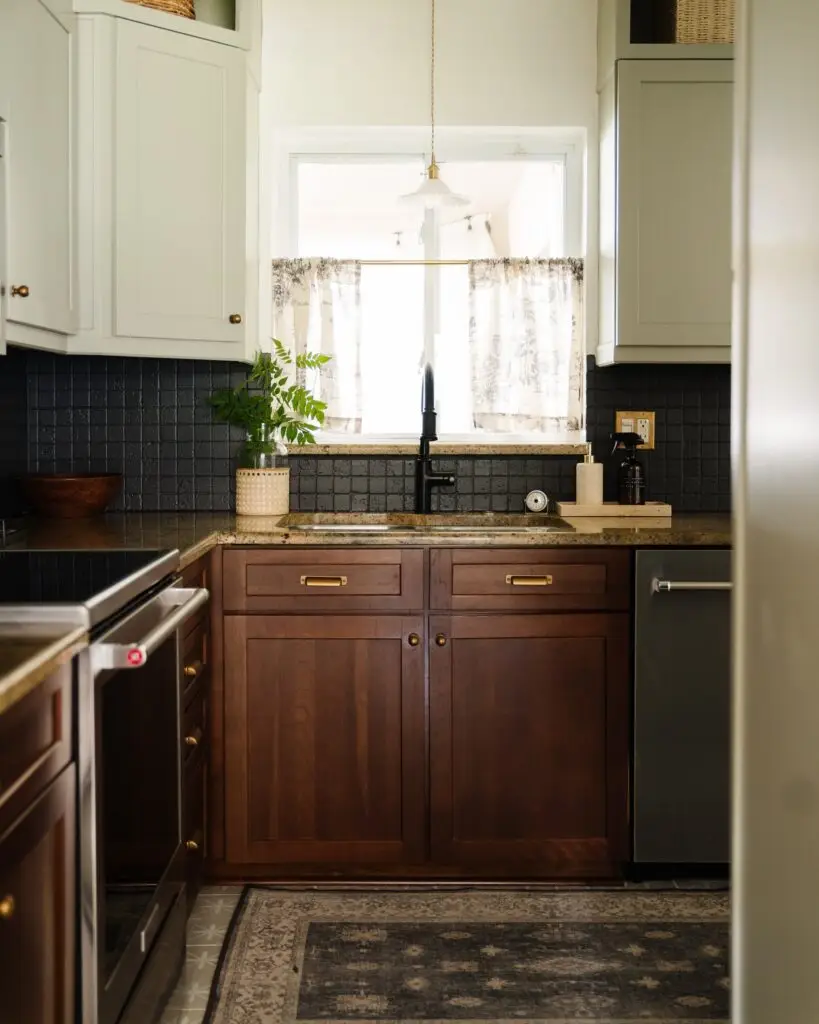
I also can’t get over this adorable patterned café curtain, the pam trees add such a fun touch. I used regular-sized curtains and cut them down to size.

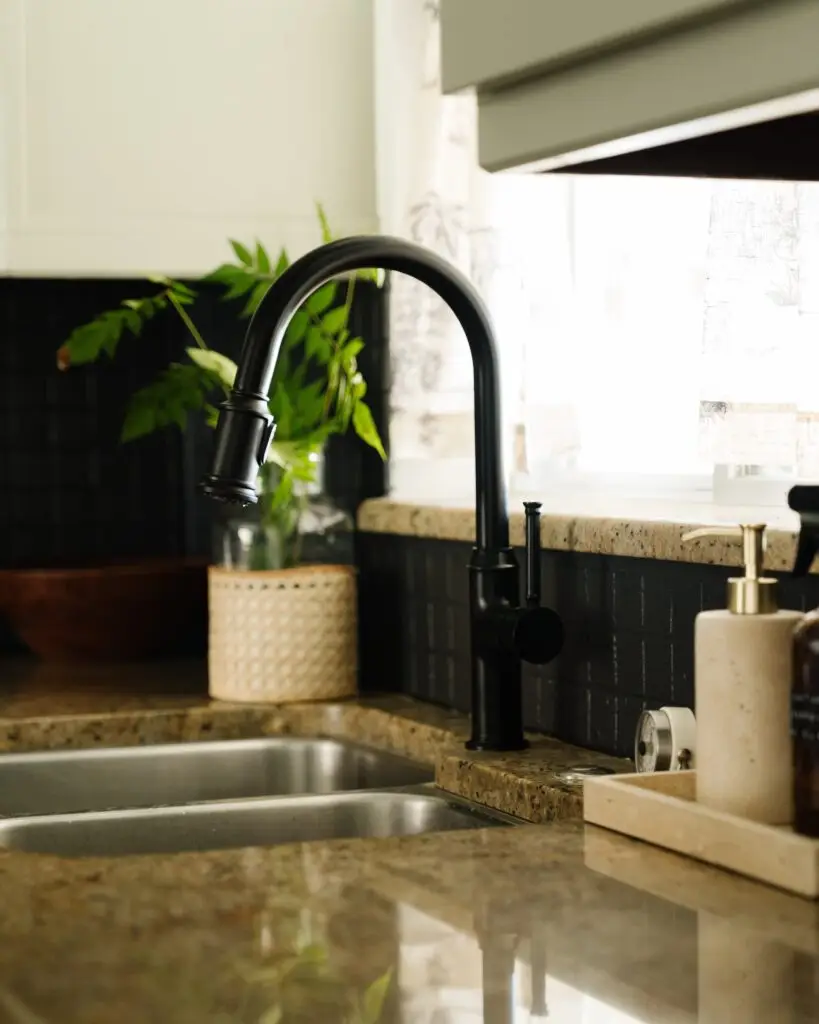
Additionally, I replaced the kitchen sink faucet with a matte black fixture. I adore the look of the new black fixture against the brown granite countertops. Opting for a darker faucet really ties the whole look together.
Open Shelving
The final touch to really pull this kitchen together was adding a few open shelves. With the paint-grade upper cabinets, I knew that incorporating wooden shelves in a similar stain to the bottom cabinets would give the kitchen an eclectic yet intentional feel. The shelves are my favorite part of the whole kitchen. They bring a relaxed, lived-in touch, along with extra storage for all your fun items. And hey, a little extra storage never hurt anybody!
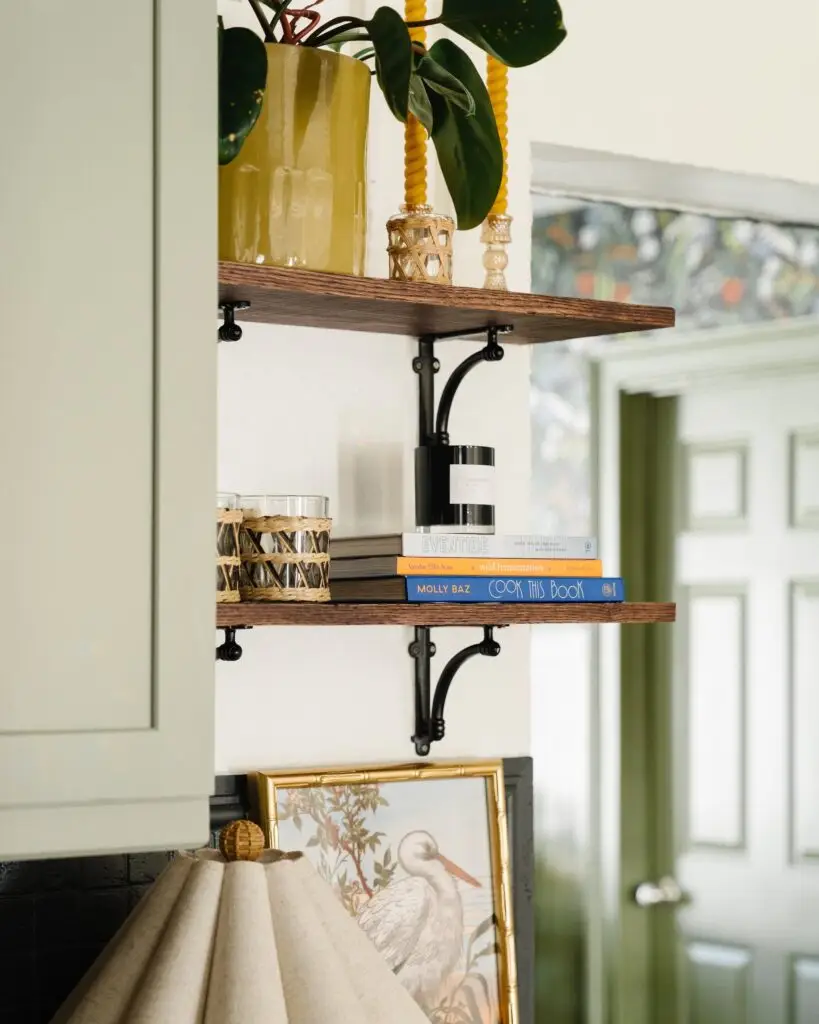
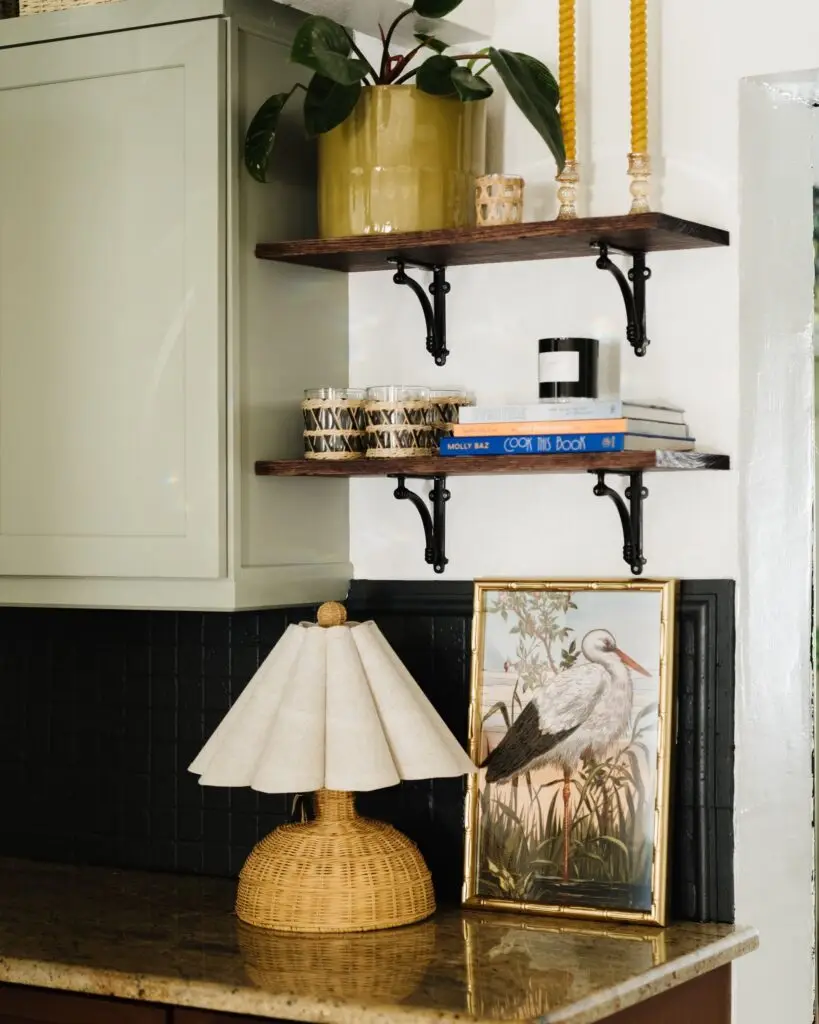
Overall, I’m thrilled with how this kitchen turned out. If you’re dealing with dated brown granite countertops or another feature that isn’t your favorite but can’t be changed, don’t let that hold you back from working with what you have and elevating your space to make it feel like home and truly love it.
LAMP (SIMILAR) | RUG | YELLOW CANDLES | FAUCET | PENDANT LIGHT | PULLS | KNOBS | SHELF BRACKETS | CURTAIN ROD | CURTAINS | WICKER BASKETS | BRONZE WALL PLATE | TILE
In total, we spent $2500 on materials to extend the cabinets, paint the upper cabinets, walls, and backsplash, re-tile the floor, and swap out all the extras. Between these creative DIYs and the new premium appliances, this modern kitchen with brown granite countertops checks all the boxes for creating a space that truly feels like home!
